

A 4 Day Yellowstone Itinerary for Hikers & Sightseers
This post contains affiliate links. That means I may earn a small commission at no extra cost to you, if you buy through my site. I appreciate your support of my site.
Have you always wanted to feel like Alice in Wonderland? Unless you find a rabbit hole, Yellowstone National Park might be your best bet. Located primarily in Wyoming, the park started to draw attention from early explorers in the mid 1800s. Newspapers turned down articles from these explorers when they described unbelievable geothermal features. The out of this world landscapes were too much for people to believe!
Soon enough these very real wonders were spreading far and wide. President Ulysses S Grant established Yellowstone as the first US national park in 1872. Coined as Wonderland, tourists couldn’t wait to experience the park for themselves. Although the methods of transportation have changed, over 150 years later visitors are still pouring into the park.
As the 8th largest park, there is a lot to see and do. It can take several hours to drive from one park entrance to another. It’s best to base yourself in a different place every night to make the most of your time and avoid backtracking.
With 4 days in Yellowstone you’ll be able to visit four of the best regions in the park. This 4 day Yellowstone itinerary can be adjusted for hikers or sightseers. I recommend a mix of both. For some reason people don’t hike as much at Yellowstone so the trails are a really nice way to get away from the camera loving crowds. The iconic sights are worth braving the tourists though.
The trails and sights within each day are described in geographic order. Create your own adventure each day! Ideally plan for an extra evening and extra morning before and after in order to have four full days in Yellowstone.
If you’re planning to visit Glacier National Park, spend four days in Glacier. Then make a stop in Great Falls and/or Helena. Continue to the north entrance of Yellowstone where this itinerary picks up.

4 Day Yellowstone Itinerary
Day 1: Mammoth
Your 4 days in Yellowstone National Park begins on the north side of the park. Gardiner is the closest town right outside the northern park entrance. It’s the only year-round entrance. Spend your first day in Mammoth.
What to Do
Roosevelt Arch

Gardiner is a small town with restaurants and shops. The biggest “attraction” is the historic Roosevelt Arch. It was built in 1903 as the first major entrance to the park. Visitors originally arrived by horse drawn carriage, but in 1903 the train came to Gardiner. The arch welcomed the visitors into the park. Now you can walk or drive through the arch.
Rafting
From the middle of May to the middle of September go rafting on the Yellowstone River right from Gardiner. Enjoy a scenic float for a more relaxing experience or a half day whitewater adventure that includes rapids. A longer whitewater rapid excursion with lunch is also available. I was too late in the season for this adventure.
Albright Visitor Center
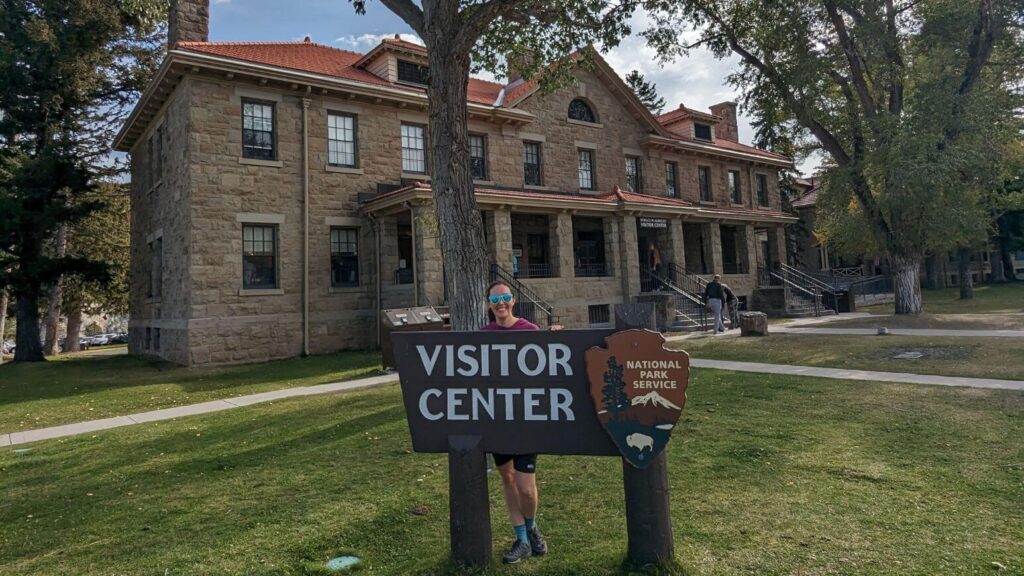
Most sections of the park have a visitor center. I always like stopping at each one to stamp my national park passport book. For bigger parks like Yellowstone each region of the park has its own stamp.
Each visitor center has different exhibits as well. As the Albright Visitor Center provides history on Yellowstone’s cultural history, it was the most interesting to me. I always gravitate towards the history of people and places, versus the scientific information. I was intrigued about the early years of the park and how the US Army was required to come to the park and restore order. There was also some information on the different types of animals in the park, including the differences between grizzly and black bears. Don’t worry, I will share where you can learn about the science of Yellowstone too!
We also talked with a ranger where we received a lot of great tips about hiking in the area. While I recommend you talk with a ranger yourself as they are always so helpful and it’s good to receive up to date information, if you’re not able to, keep reading my Yellowstone itinerary for tips!
Mammoth Hot Spring Terraces
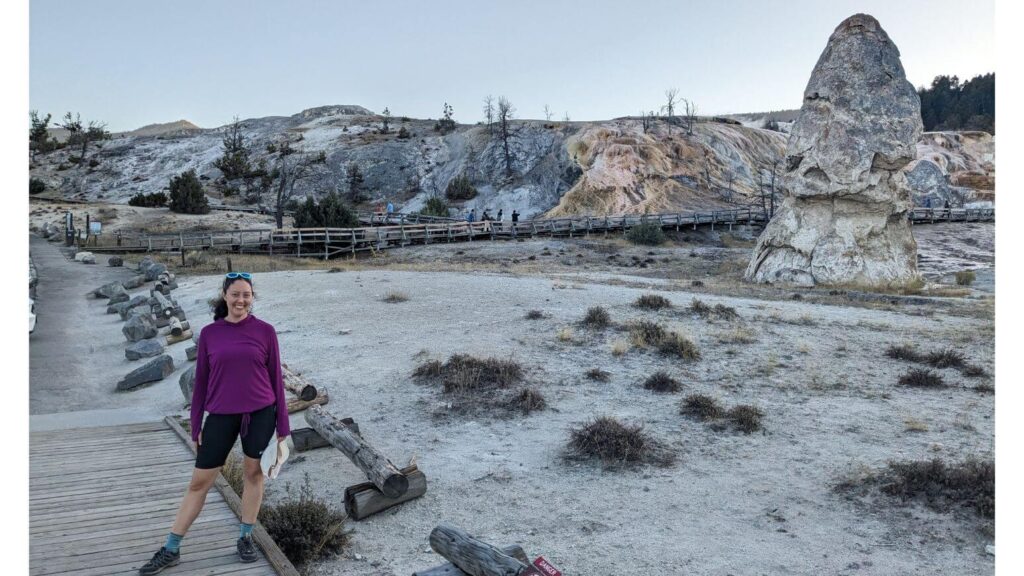
One of the main reasons visitors flock to Yellowstone is to see the amazing hydrothermal wonders. The Mammoth Hot Spring Terraces are the areas namesake and main draw.
The travertine terraces were formed when hot mineral rich water bubbled up from the ground, cooled, and deposited calcium carbonate which causes the white bubbly appearance you can see today. You can explore this area on foot or in your car.
Boardwalks go up and around the lower terraces for close up views from different angles. With stairs and inclines it’s not handicap accessible, but it is a fairly easy and short walk. You can view the upper terraces from your car.
Beaver Ponds (moderate loop trail) and Sepulcher Mountain (challenging mountain trail) begin in this area.
Wildlife
Wildlife enthusiasts will be in for a treat at Yellowstone. Elk are abundant in Mammoth, especially in September and early October during “rut” or mating season. Male elk grow huge antlers. They bugle, a loud high pitched call, to attract females and challenge other males. They use their antlers to wrestle and challenge each other.
We were so lucky to see a herd of elk in action right near Mammoth Terraces in the evening before sunset. Back in Gardiner around Roosevelt Arch and the Yellowstone NP sign we saw several more.
Golden Gate
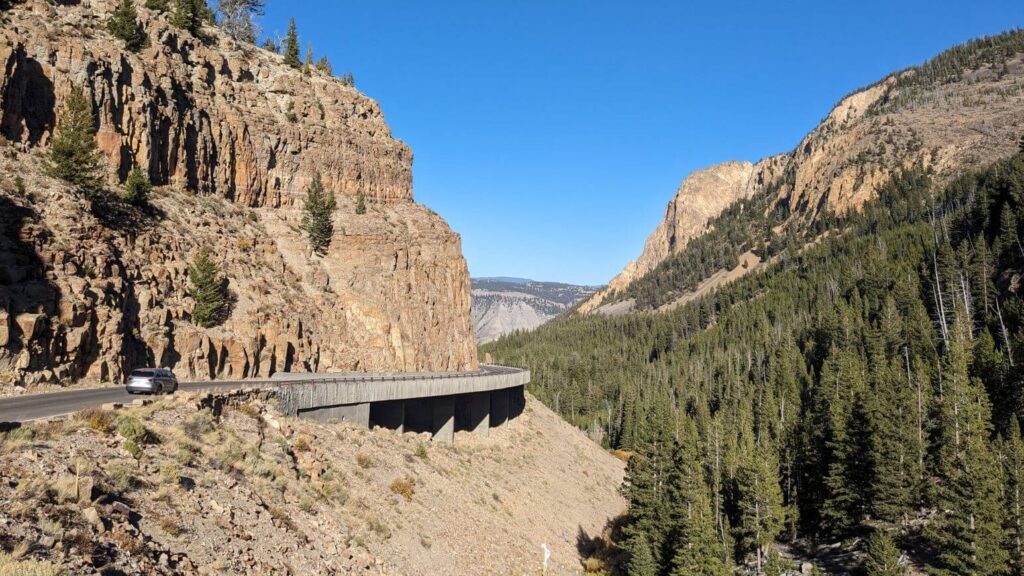
What is now US – 89 was originally the first stagecoach route into Yellowstone. Along this road between Mammoth and Bunsen Peak is a quick roadside pullout stop. An informational sign describes the process of building the initial unstable bridge in 1885 and how it has thankfully been rebuilt many times since.
There is a lovely waterfall you can see right from the pullout. I saw the view when sunlight was hitting the surrounding flora to create a pretty golden glow.
Bunsen Peak Trail
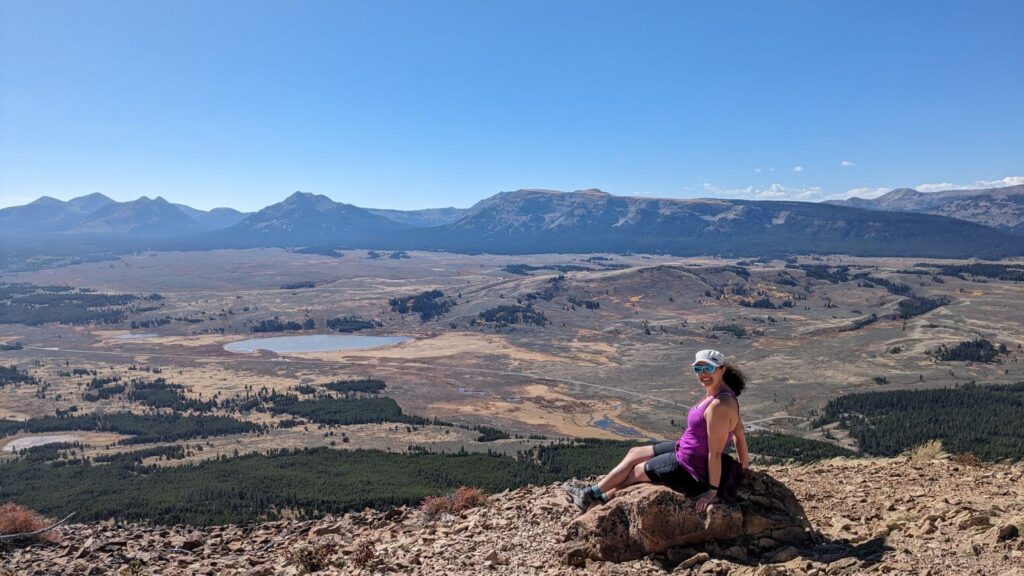
Initially I was concerned that there wasn’t hiking at Yellowstone as I found so little information about trails. I thought, perhaps the hiking isn’t good at the park. That couldn’t be farther from the truth! You would never know that Yellowstone receives over 4 million visitors a year when you’re on a hiking trail.
We hiked Bunsen Peak. The Bunsen Burner and Bunsen Peak were named for physicist Robert Wilhelm Bunsen. I’m not a big fan of Mr. Bunsen’s first namesake as in high school chemistry I was always scared to light my bunsen burner! Luckily the trail named after him was much more enjoyable!
The 4.3 mile out and back hike up Bunsen Peak gains 1,282ft. There are great views throughout the entire hike, but the peak offers panoramic views of the park. We had the peak to ourselves too! If you have more time you can continue past the peak and return to the trailhead on a clockwise loop trail.
There are no restrooms at the trailhead or on the trail. The trailhead parking lot is small.
Where to Eat
Mammoth
Mammoth Hotel Dining Room is the first 4 star certified green restaurant in any national park. Currently it’s one of only 25 in the country. This is great from an environmental standpoint, but most reviews still rank the food as average.
Mammoth Terrace Grill is a casual fast-food style restaurant with simple American staples. For drinks head to the Map Room Bar.
In addition to souvenirs and apparel, The Mammoth General Store has ice cream, groceries, and lunch items.
Gardiner
Wonderland Cafe is not only appropriately named, but it is also delicious. The farm to table restaurant should really be called grassland to table or ranch to table! The menu is full of local Montana game and produce like Wild Game Chili Mac, Montana Ranch Ribeye, and the Montana Burger with huckleberry bbq sauce. I had the bison ravioli. While the dish was very flavorful, the portion was a little small, especially after a long hike and a light lunch on the trail. Waits can be very long. We put our name on the list, went to our hotel to check in, unpacked, shopped in a store, and still had a wait at the restaurant.
Big Sky Baked and Loaded was also on my list. It’s a food truck that serves baked potato bowls. The Coral is another outdoor spot. They are known for burgers made from different types of meat.
Yellowstone Mine is open for breakfast and dinner. It has very low reviews so you may want to skip it for dinner. As breakfast wasn’t included at our hotel and it was next to the hotel I gave the buffet breakfast a try. While there is an a la carte breakfast menu, only the buffet was an option. It exceeded my expectations and I was happy with the selection. The french toast was especially delicious. It was definitely worth the extra cost to have a filling breakfast to start off day 2 at Yellowstone.
Where to Stay
Mammoth
Mammoth Hot Springs Hotel and Cabins are located in the heart of Mammoth only footsteps away from the visitor center, restaurants, hot springs, and prime elk viewing. The hotel is open year-round. Cabins with no bathrooms start around $180. Hotel rooms in summer are frequently over $300 if not $400 a night.
Mammoth Campground is also open-year round. It’s first come first serve from October 15th – April 1st and by reservation the rest of the year.
Although closed for 2025, Indian Creek Campground is a seasonal place to camp in the area. It is about a 10 minutes drive south of Bunsen Peak.
Gardiner
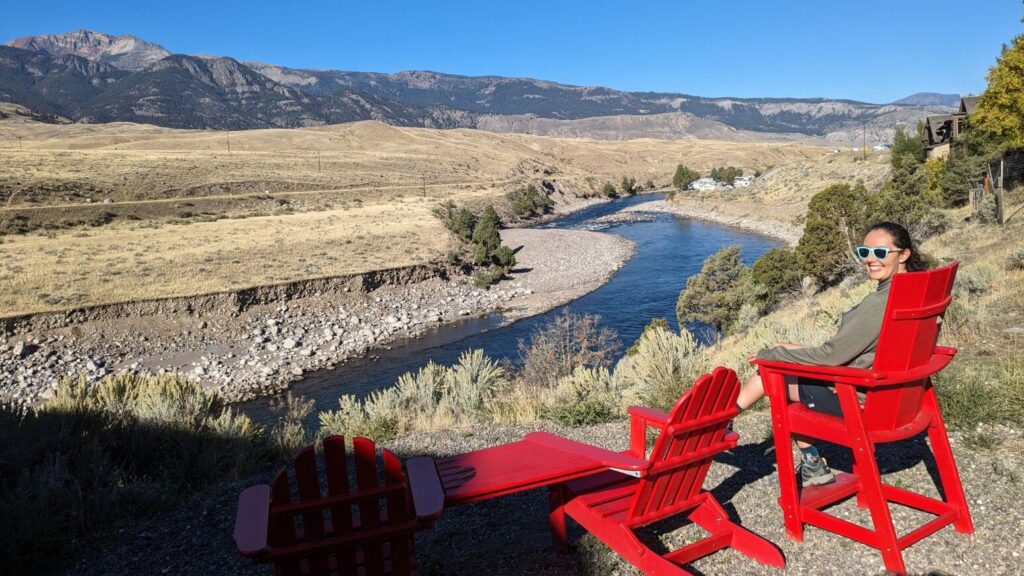
We stayed at The Ridgeline Hotel located right on the Yellowstone River. Take note that there are no elevators at the hotel. I always request a top floor room, but my “porter” wasn’t quite as pleased when my request was granted! It was a great view of the river. I’m embarrassed to admit that it wasn’t until the next morning when I realized that the “noise” I had been hearing all night was the rushing water and not some random AC or fridge noise in the room! This city girl has had way too many random noises. There are a lot of nice communal seating areas around fire pits and with views of the river.
Absaroka Lodge, Yellowstone Riverside Cottages, and the Super 8 are all centrally located two star hotels with good reviews. They are all in the lower price range, but Gardiner accommodations are expensive overall.
Day 2: Lamar Valley
Day 2 of this Yellowstone itinerary begins by retracing the drive from Gardiner to Mammoth. Drive through Mammoth without stopping and head east on the Grand Loop Road. At Tower Junction turn left and drive on US-212 all the way to Silver Gate or Cooke City. On the way there are plenty of hikes, scenic spots, and places to observe wildlife.
What To Do
Undine Falls

The Lava Creek trail travels 8.9 miles out and back from near the Mammoth Campground to the Lava Creek Picnic Area. The best part of the trail is the short hike to Undine Falls from the picnic area. While technically in the Mammoth area, unless you want to do the entire hike, Undine Falls is a great first stop when driving east to Lamar Valley. Park at the Lava Creek Picnic Area to the right when driving east (vault toilets in the parking lot). As the name implies there is a creek with picnic tables. We weren’t quite ready for lunch when we were here, but it is a lovely spot.
Cross the road to find the trailhead, labeled Lava Creek. After a few hundred feet turn left at the T junction. The hike is through a meadow with no shade. It’s easy to miss, but after walking for about 10 minutes there is a little spur trail to the left that heads to the edge with a view from above of Undine Falls. It’s a beautiful falls and unlike some of the more popular ones in the park, it isn’t crowded and only requires a short hike. We had the spot to ourselves.
We wanted to check out if there were more views of the falls. We continued on the Lava Creek Trail a bit farther towards Mammoth as it went down into the canyon. While it was a gorgeous day and a pretty area there weren’t any more views of the falls. The white patch of Mammoth Hot Springs can be seen in the distance though.
Hellroaring Trail
This trail is on my list for a future trip. It’s a 2 mile moderate out and back trail that goes to the Yellowstone River. The trail caught my attention because of the cool looking suspension bridge over the river.
Lamar Valley
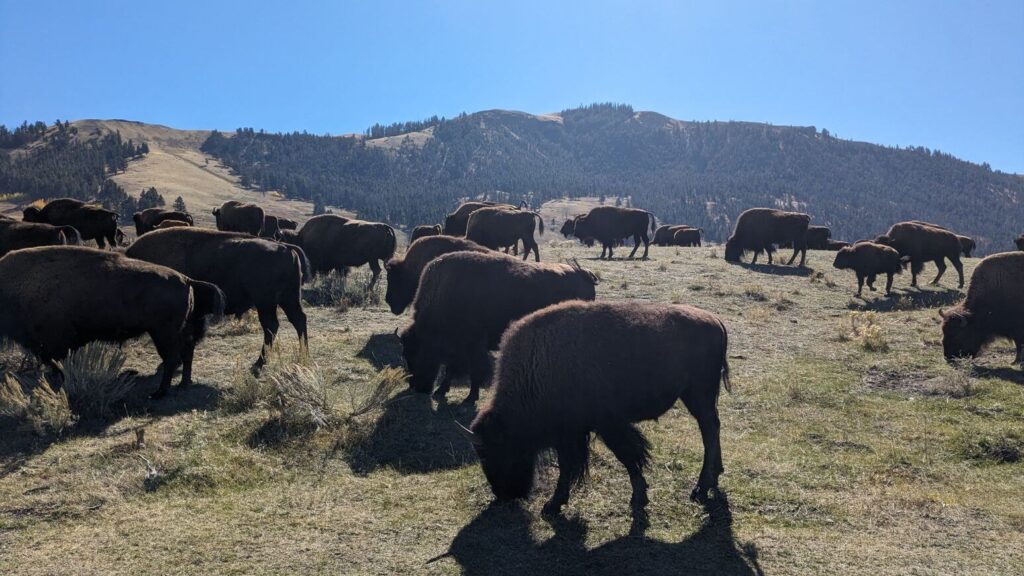
Once past Tower Junction you will officially be in Lamar Valley. This Northeastern section of the park is full of wildlife. It’s very common to see herds of bison. While you may need to keep your eye out for lone bison, when there are herds of bison you’ll probably see the cars stopped along the road before you see the bison!
Use roadside pull offs to view and photograph bison. There are quite a few along this road. Stay at least 25 yards away.
The social media team behind Yellowstone NP has a great sense of humor. They have a lot of really clever postings. One of the funniest is “Believe in yourself like visitors who believe they can pet a bison”. Just so we are clear you should believe in yourself, but you should NOT pet a bison or come anywhere close to petting a bison!
Another highlight of Lamar Valley is the fall colors. Yellowstone isn’t known for fall colors, but there are some spots in Lamar Valley where you will be treated with the brilliant yellow leaves of aspen trees.
Slough Creek Trail
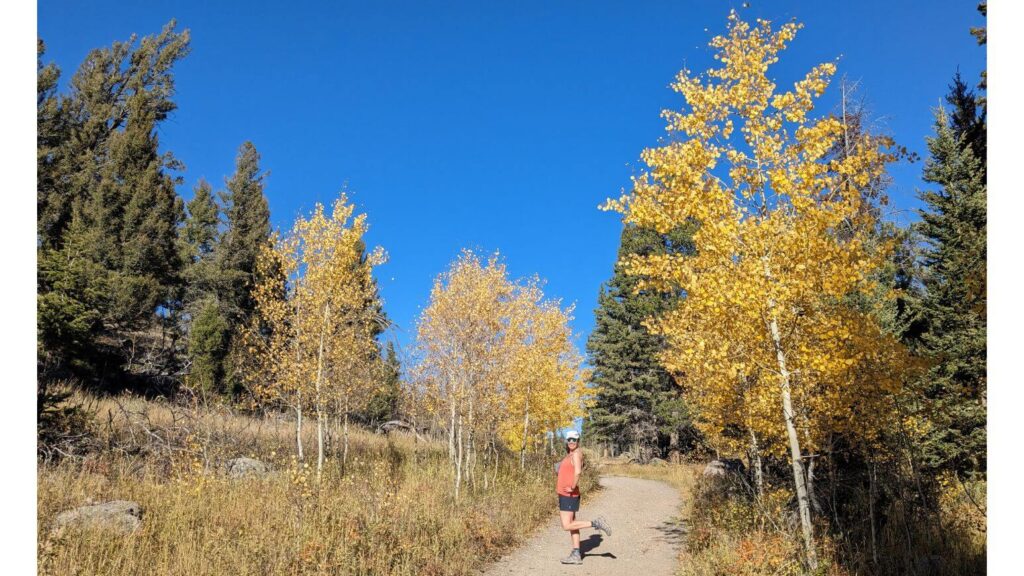
Slough Creek is one of the trails in Lamar Valley with pockets of lovely color. To reach the trail you’ll need to drive for 10 minutes on a dirt road off of US-212. There are vault toilets at the turn off and at the trailhead. The ones at the turn off are better.
It’s a long 19.8 mile out and back trail that allows backcountry camping with permits. The trail is relatively easy, at least the first few miles. The difficulty mostly comes from the length.
There is a bit of a climb initially, but then the trail leads to fairly flat open meadows. We only hiked a few miles, but saw hardly any other hikers, especially past the first mile. As the trail follows Slough Creek, it can be popular for fishing. We did see a few fishers.
Although the trail doesn’t have one epic viewpoint, it’s one of those trails that has lovely scenery the whole way.
Lamar River Trail
At 31.6 miles out and back Lamar River Trail is also a long trail, but like Slough Creek it doesn’t have a specific point that you “need” to reach. You can turn around at any point. It’s common to see wildlife on the trail.
I struggled to choose hikes in Yellowstone to do everyday. I will be honest, I chose Slough Creek over Lamar River simply because there was a vault toilet at the former and not the latter!
Trout Lake Trail
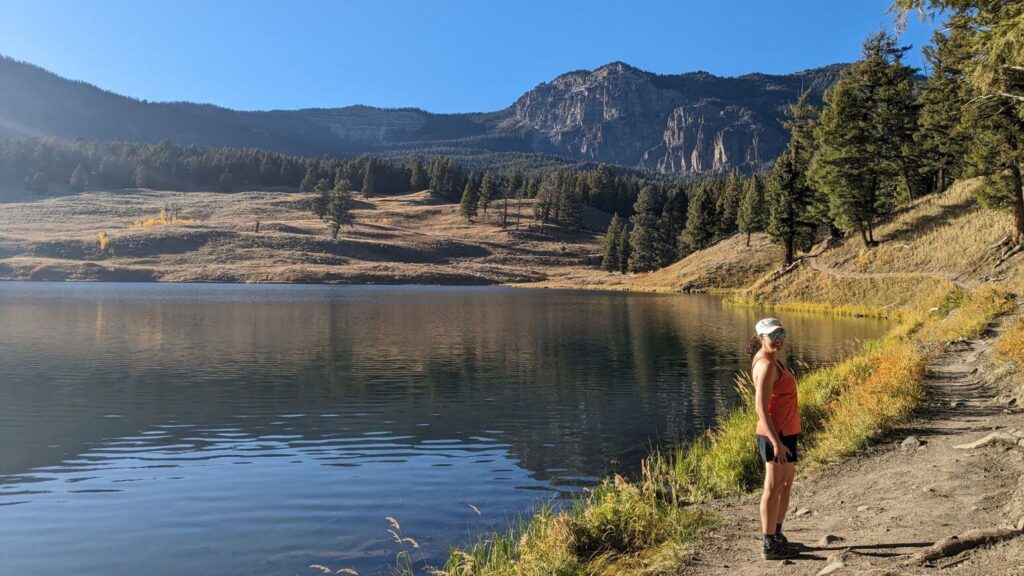
We fit in one more hike at golden hour, right before sunset. The trail begins with a short climb to the lake. It is then a loop around the lake and back down the trail to the parking lot. It’s an easy 1.2 mile hike in total.
I guess I need one of those animal footprints books as we saw some pretty big tracks on the trail around the lake, but didn’t know what they were. Despite wondering what animal might be lurking, the hike is very peaceful and scenic.
The parking lot is a small pull out with spots for only a few vehicles. There are no toilets at the trailhead.
Cooke City Montana Museum
Cooke City is a small town near the Northeast Entrance that is described more below. With an opening time mid-morning and closing in the early evening, it didn’t work out to visit the museum on my 4 day Yellowstone itinerary, but I would have liked to check out the small, local history museum.
Where to Eat
Lamar Valley
Built in 1920 the rustic Roosevelt Lodge is now home to the Roosevelt Lodge Dining Room. It serves hearty american fare.
Silver Gate
Silver Gate is the closest town to the northeast entrance. With a population of under a 100 I don’t need to tell you that it is a small town. There aren’t a lot of places to eat and they are only open from about May to September. I’m very curious what the permanent residents do most of the year!
Silver Gate BBQ is a highly rated BBQ food truck. If it wasn’t for the chilly evening I would have happily ordered food from there.
The Log Cabin Restaurant is open for breakfast and lunch. I almost had breakfast there and can’t quite remember what stopped me. I do remember I ate breakfast in bed so perhaps I didn’t want to make the 2 min walk!
The Range Riders Lodge has a tavern. The menu online is all drinks, but the owner of our lodge said they serve pub food.
That’s all for Silver Gate!
Cooke City
As I wanted an indoor restaurant and not a bar or food truck, we headed to Cooke City. It’s a slightly bigger town just down the Beartooth Highway from Silver Gate. By bigger I mean in size, as the population in Cooke City is also quite small. The majority of restaurants are also only open from about May – September.
We lucked out dining at Beartooth Cafe on their last night of the season. It’s a cozy log cabin restaurant. Montana is known for trout, so when in Montana one must have a trout dinner!
Miner’s Saloon is another option. The menu is mostly burgers and pizza. There’s also the Bistro Cafe Restaurant, but it has the lowest ratings.
Breakfast, lunch, and coffee are available at Cooke City Coffee.
Where to Stay
Tower Junction
Roosevelt Lodge at Tower Junction provides convenient access to Lamar Valley as well as day three’s route. Open from June through August, you can book rustic cabins here. There are options with and without bathrooms and running water. None of the cabins have air conditioning, internet, TV, radio, or cooking allowed. But they do have an alarm clock, fan, and heat!
Tower Falls
Tomorrow, day three of this Yellowstone itinerary, begins with a stop at Tower Falls. Tower Fall Campground works best for an option on night two to avoid backtracking on day 3. You can check out Tower Falls in the evening or start fresh the next morning (described first on day 3).
Lamar Valley
Slough Creek Campground is a fairly remote campground close to some of the best wildlife in the park. It’s about .5 miles from the Slough Creek Trailhead. There is backcountry camping available on the trail with a separate permit.
The closest campground to the northeast entrance is Pebble Creek Campground. It’s closed for 2025 and the foreseeable future.
Silver Gate
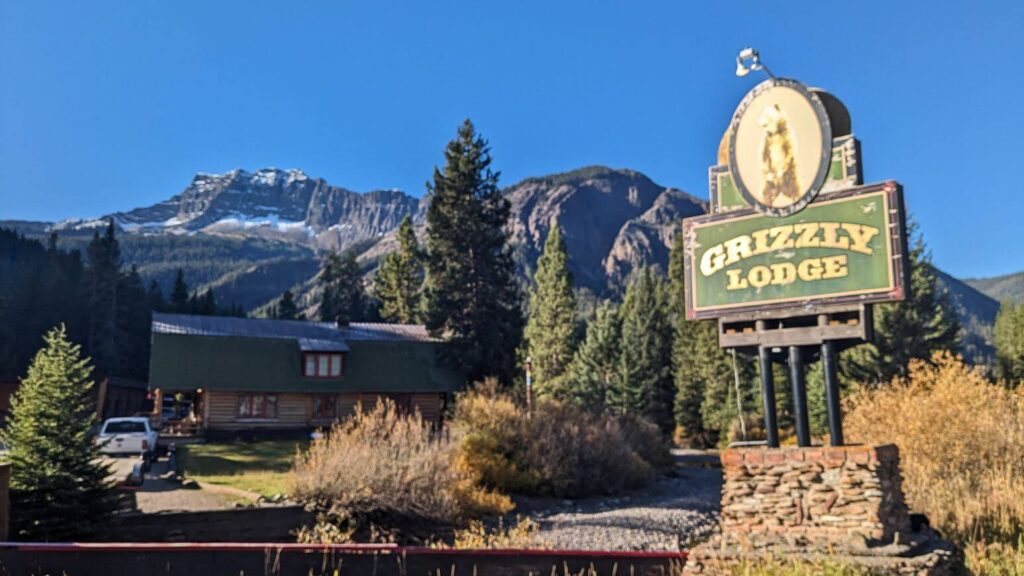
Who needs camping when a bear can walk right up to your door! No this didn’t happen…… at least to my knowledge. Maybe it was the name of our lodge, Grizzly Lodge, but I sure felt like there could have been bears out there in the wilderness. Rooms are cabin style, but they do come with bathrooms, a mini fridge, wifi, and TV (three of the four I appreciated!) There are suites and actual individual cabins too.
Cooke City
Cooke City has a few more options for places to stay. The best rated include:
- Super 8 – reliable 2 star chain with breakfast included
- Alpine Motel of Cooke City – a basic motel
- Elk Horn Lodge – a mid-range property offering cabins and rooms
Day 3: Tower Fall & Grand Canyon of the Yellowstone
Between your starting point near the northeast entrance and your ending point in West Yellowstone you will cover 80 miles today. There is a lot to see and do as you travel across the park.
What To Do
Tower Fall Overlook & Trail
After driving back through Lamar Valley on US 212 and possibly stopping for some more wildlife viewing, turn left (heading south) on Grand Loop Road.
Tower Falls is a .9 mile out and back trail. The first .1 mile is a paved trail to an overlook above the waterfall. It was nice, I mean what waterfall isn’t? As it wasn’t super close and the viewing area is small and crowded, it’s not a “must” to see. The trail continues down a short distance to the river. We didn’t do this section as there are no more waterfall views and most reviewers said it wasn’t worth it.
The great part of Tower Falls trail is that it is accessible to the overlook. The downside is that it draws a big crowd. With a large parking lot, restrooms, and a general store it is an attractive stop for everyone https://www.wildfornature.com/how-to-make-lotion/.
Mt Washburn Trail
This is one of the most popular hikes at Yellowstone. It offers spectacular views of the park from above the treeline. While I would have loved to do this hike, we skipped it as we hiked another peak on day 1, Bunsen Peak. There are so many potential hikes and sights every day of this Yellowstone itinerary, but day 3 may have the most. At 7 miles round trip, Mt Washburn Trail would take a good chunk out of the already packed day 3.
Mt Washburn also isn’t recommended in the fall as there can be a lot of grizzly bears, although no reviewers from last fall mentioned seeing bears. It’s best in July and August when the snow has melted and the wildflowers are blooming. It can be very windy at the top, but you can go inside the fire lookout where there are exhibits and restrooms.
It’s most scenic to start from Dunraven Pass, but access to the trail is also available from Chittenden Rd. After driving this narrow, dirt road you’ll have a 5 mile round trip hike to the peak.
Canyon Visitor Education Center
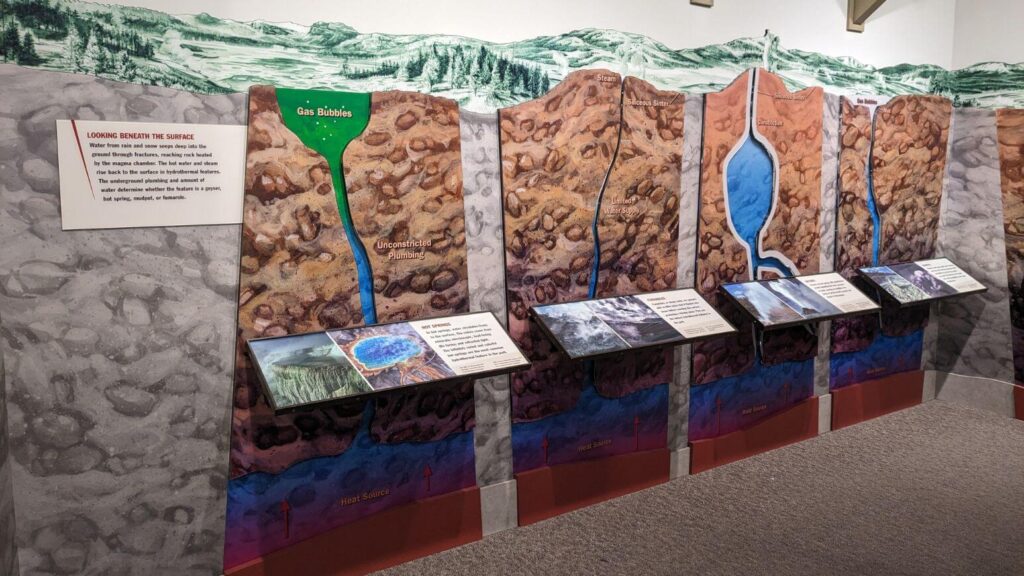
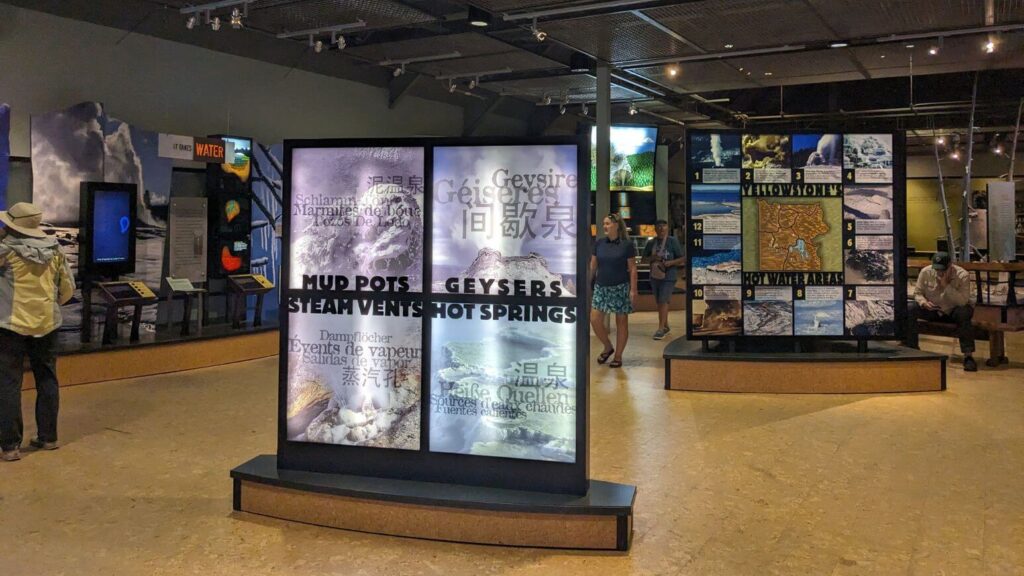
Although Yellowstone is a very well known and visited National Park, most people don’t know that Yellowstone is a super volcano! It’s one of the most active volcanic systems in the world. The geothermal features including hot springs, mud pots, fumaroles, and geysers are a result of the volcanic system.
Don’t just take my word for it, continue on Grand Loop Road to the Canyon Visitor Education Center in Canyon Village. The seasonal education center has exhibits on the geology of Yellowstone. Don’t miss the exhibit on the differences between the different hydrothermal features. It will come in handy when you see them for yourself.
There are also films to watch and helpful rangers on hand to answer questions and make recommendations.
Grand Canyon of the Yellowstone
Everyone always asks “beaches or mountains”. While I love them both, I want to add in a third option “canyons”. I loved hiking in the Grand Canyon, and was really intrigued when I discovered the Grand Canyon of the Yellowstone. I knew it had to be included on my 4 day Yellowstone itinerary.
Unlike the arduous hike down to the Colorado River in the Grand Canyon, the Yellowstone River, which created the canyon and the upper and lower falls, is much easier to see. I’m not going to attempt to explain the science of the canyon, but I will provide a great hiking and sightseeing route to take in the best views!
If you’re following this Yellowstone road trip, starting in Lamar Valley and ending in West Yellowstone, you’ll want to visit the South Rim before the North Rim. You’ll make a giant loop without backtracking as the North Rim Dr is a one way road that leads you back to Canyon Village.
South Rim Trailhead
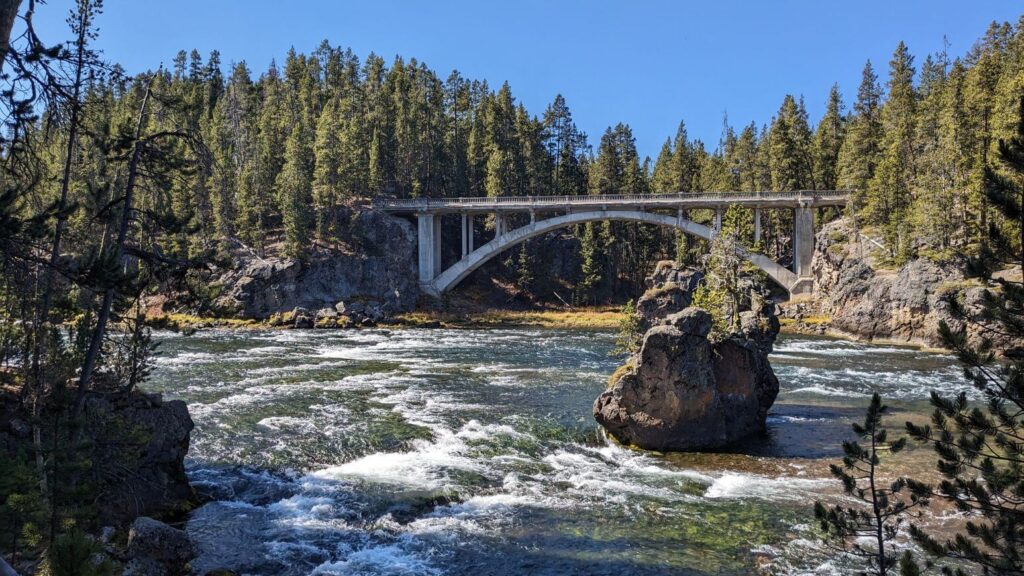
While this whole Yellowstone itinerary is a choose your own adventure, you have several options at the Grand Canyon of the Yellowstone. As I said above, head to the South Rim first. I’m going to present the longest option that includes a loop hike and all the viewpoints, but I will note places to turn around and other starting points.
Park at the Wapiti Lake Trailhead if you would like to do more hiking and have more time. Start by walking along S Rim Dr towards the Yellowstone River (to the west). Walk across the Chittenden Bridge for great, unobstructed views of the river. Carefully cross the street and head back to the side of the river where you started (to the east). The South Rim trail begins next to the river (NE).
Discovery Overlook
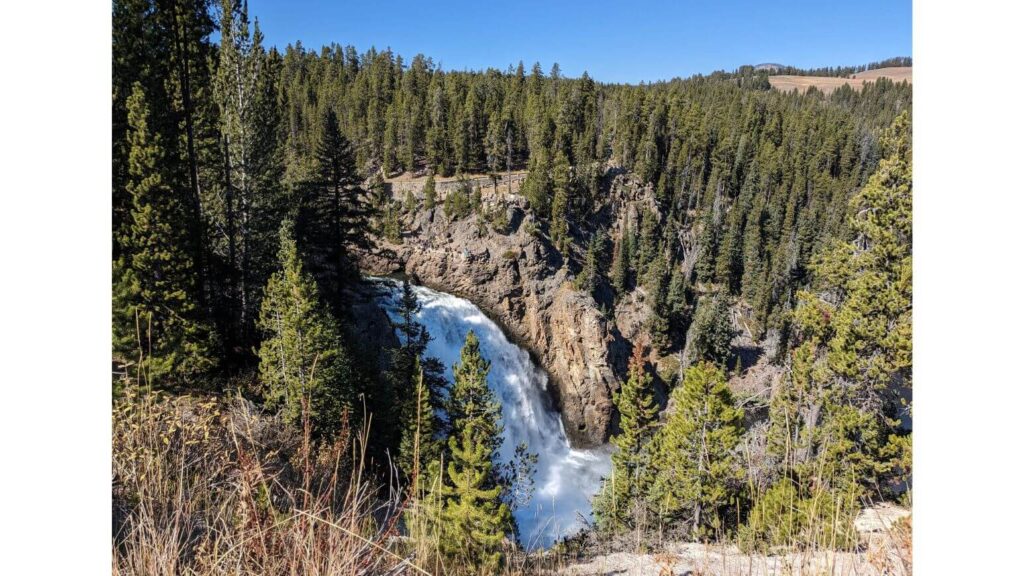
The South Rim trail travels for about 3 miles. The trail follows the Yellowstone River through the forest. Brink of the Upper Falls is a viewpoint on the opposite side of the river that you can see at about .5 miles (Discovery Overlook). Although the falls are much closer on the north side, from the south side this is the closest viewpoint.
Discovery Overlook is also significantly less crowded. Up until this viewpoint we saw very few other hikers. There is no parking here so there aren’t as many visitors and the ones who are there typically parked at the Upper Falls Viewpoint.
Upper Falls Viewpoint
Continue to the Upper Falls Viewpoint, which is quite crowded as there is a parking lot. It’s a slightly different, farther away angle than from Discovery Point.
Artist Point
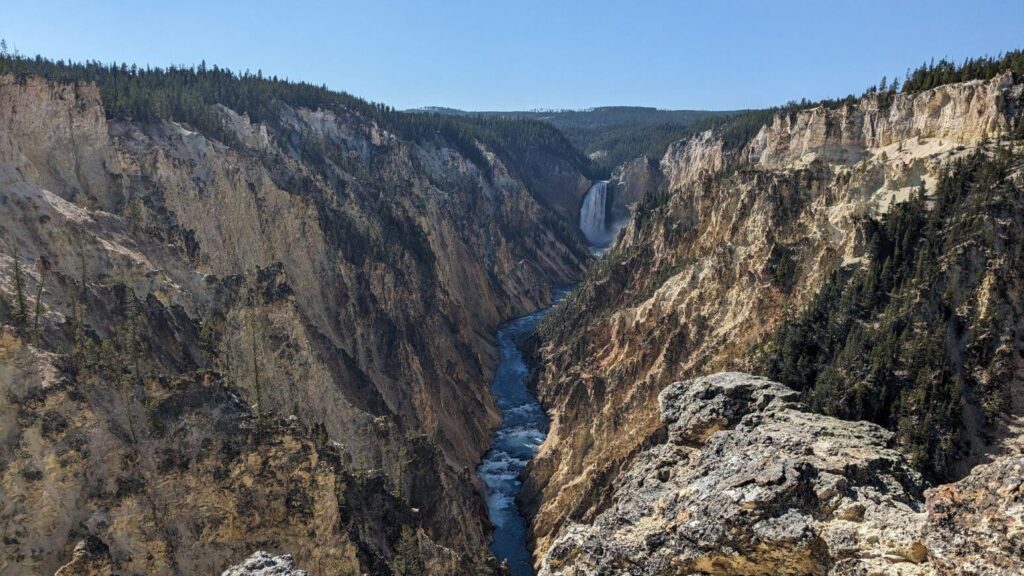
Then head to Artist Point. This viewpoint also has a parking lot and many sightseers. One of the viewing areas is accessible. It’s one of the most iconic views of Yellowstone as you can admire both the upper and lower falls. Depending on the time of day and the sunlight, you can see a variety of colors in the canyon. The viewpoint was named for Thomas Moran who painted the falls in 1872. Although Thomas Moran did paint the falls it was later discovered that he painted them from the North Rim at Lookout Point.
The South Rim Trail really showed how few people hike at Yellowstone. Between viewpoints there were hardly any people, but at the Upper Falls and Artist Point viewpoints it seemed like there were hundreds of people. Simply walk 5 minutes down the trail and notice how almost all of the people are gone! If you’re able, I highly recommend walking the whole trail instead of driving to the two viewpoints. As nice as the viewpoints are, the trail sections in between have a lot of nice river and waterfall views too.
This is the end of the South Rim Dr. If you drove to the viewpoints (Upper Falls & Artist Point), turn around and go to the North Rim.
If you hiked here from any of the three parking lots (Wapiti, Upper Falls, or Artist Point) you can head back for an out and back hike. For the individuals who did hike it seemed like they turned around at this point. I distinctly remember commenting on the abrupt difference between the hordes of people at Artist Point and then no-one in sight a few feet onto the Clear Lake Ribbon Trail. If you do want to continue hiking……
Point Sublime
……..you can go to another viewpoint, Point Sublime. There are many more great views along the trail.
Point Sublime is the end of the trail so you will need to return the way you came, take the Clear Lake Ribbon Trail back to Artist Point or continue south (to the left) at the junction before Artist Point.
Clear Lake-Ribbon Trail
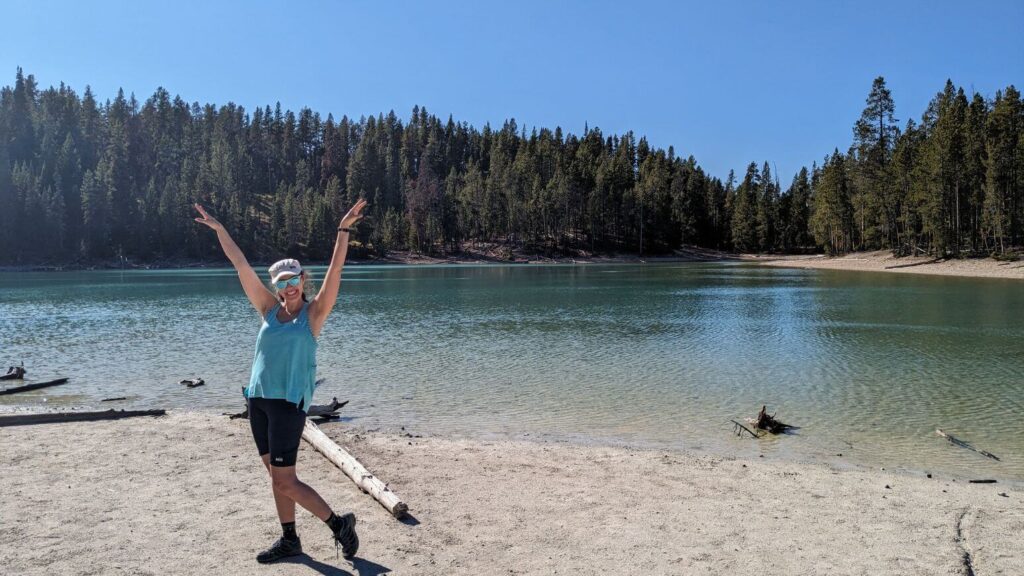
As nice as the viewpoints were, we skipped Point Sublime as we wanted to do the entire loop trail back to Wapiti Lake Trailhead where we parked. Before reaching Point Sublime we turned right at the T junction and headed south towards Clear Lake and Ribbon Lake.
What makes the South Rim – Wapiti – Clear Lake- Ribbon Trail Loop one of the best hikes in Yellowstone is the diverse scenery. From the junction you’ll leave the canyon, waterfall, and river views behind. Don’t let that discourage you. There is a really cool mix of terrain still ahead. First you’ll hike in a forest past Lily Pad Lake.
At the next trail junction take a right towards Clear Lake and not Ribbon Lake. Despite the trail name, the loop doesn’t go to Ribbon Lake. You can add on an extra detour to Ribbon Lake (to the left) or connect with many other trails.
Before reaching Clear Lake, there is a hydrothermal area with a lot of bubbling, hissing, and steaming going on! Clear Lake on the other hand is a beautiful, calm, and pristine spot. After the lake you’ll be trekking through a wide open prairie. In addition to the changing scenery, what I loved about this trail was the lack of fellow hikers, especially on the back half of the loop.
According to AllTrails this entire loop is 4.7 miles. I recorded it at 6.1 miles. It also took us almost double the amount of estimated time given, but I don’t like to rush! We had a lunch break, bathroom break, and lots of photo stops. Whether you’re following my route or creating your own, pay attention to the trail signs at the junctions and know where you are intending to head!
North Rim Trailhead
Now that you have explored everything, well almost everything, on the South Rim, you’re ready for the North Rim. Like the South Rim Trail, the North Rim trail is also about 3 miles on foot. One end of the North Rim Trail begins next to Chittenden Bridge on the opposite side of the bridge (to the west) that the South Rim Trail begins (to the east).
Inspiration Point, which is almost across the river from Sublime Point is the other end of the North Rim Trail. Throughout the entire trail you will see similar views, but from different angles and vantage points as you are on the opposite side of the river.
Technically you can hike both rim trails with parking in one spot. The Wapiti parking lot is in the middle near one end of both rim trails. While the South Rim has options to make a loop, any hike you do on the North Rim will require the same out and back hike.
Brink of the Upper Falls
Starting from Chittenden Bridge, the Brink of the Upper Falls is the first main viewpoint. It’s an overlook with an up close view of the falls from above.
It can be accessed on a short .3 mile trail from the Brink of the Upper Falls parking lot off of Grand Loop Rd.
We skipped this one as it’s hard to hike and fit in all the Grand Canyon of the Yellowstone viewpoints in one day. We also could see the masses of onlookers from across the river!
Brink of the Lower Falls
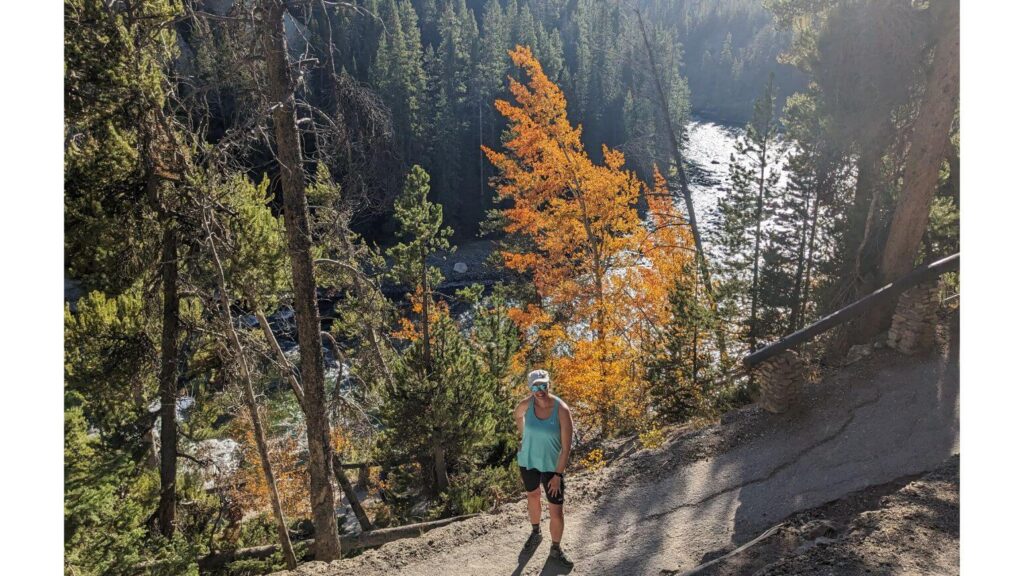
Reach the next viewpoint, Brink of the Lower Falls, by driving back on Grand Loop Rd and turning onto N Rim Dr. It’s the first stop on N Rim Dr. You can also hike here from the last viewpoint.
Similar to the Brink of the Upper Falls, at the Lower Falls you’ll see the waterfall up close from above. The main difference is that the Lower Falls are bigger and thus more impressive. I picked this spot because of that and because there was a longer hike to reach the falls.
It’s only .7 miles out and back, but it is a very steep trail. I was hoping that would deter more people, but the trail is very busy. It’s one of the top trails in Yellowstone that sightseers attempt. With the high elevation at Yellowstone and the steep trail a lot of people were struggling on the way back up. There are plenty of benches if you want a rest.
The view is excellent and in September there were some pretty fall colors along the river.
Lookout Point, Red Rock Point, Grandview, and Inspiration Point
The following four viewpoints can all be accessed from the North Rim Trail.
Lookout Point and Red Rock Point have pull out parking spots. Everyone raves about these viewpoints. Lookout Point is only a few hundred feet from the road. Red Rock Point is a .6 miles out and back trail that is compared to Brink of the Lower Falls, but with an eye level view of the Lower Falls.
Grandview offers a view into the canyon a few hundred feet from the road. There are pull off parking spots.
Turn off North Rim Drive onto Canyon Rim Rd to reach Inspiration Point. It’s a fairly short walk to the viewpoint. The falls are hard to see, but it is a magnificent canyon view.
Seven Mile Hole Trail
The Seven Mile Hole Trailhead can be found near Inspiration Point off of Canyon Rim Rd. There are around 10 pull off parking spots. We didn’t do this hike, but heard that it isn’t very crowded.
The strenuous 10 mile out and back hike goes all the way down to the canyon. Allow enough time and be prepared for a very steep ascent and descent!
Where to Eat
Tower Fall
Tower Fall General Store has a few food items and ice cream.
Canyon Village
Canyon Lodge Eatery is a food court with a variety of options. In addition to groceries and supplies, a burger diner serves sit down meals at the Canyon Village General Store. Washburn Lookout has sandwiches, pizza, and snacks.
West Yellowstone
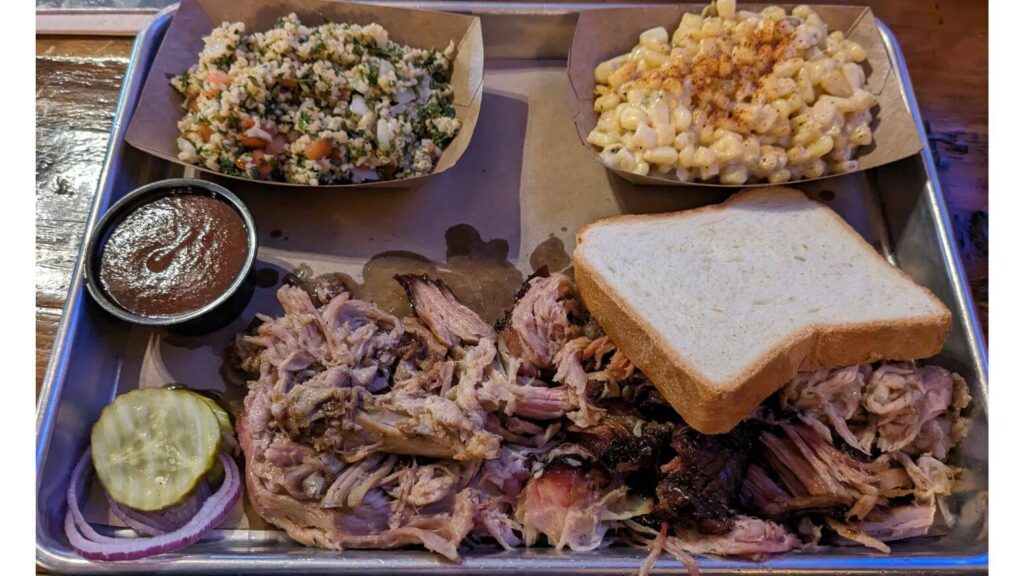
If you’re craving BBQ, choose Beartooth BBQ or Firehole Bar-B-Que. They both have good reviews, but we went with the former as they offer a lot of interesting sides. I really enjoyed the green chili creamed corn with my pulled pork dinner.
For pizza choose Pete’s Rocky Mountain Pizza or Wild West Pizzeria & Saloon. Again, both places have great reviews. Pete’s was our choice, but I honestly don’t remember why it won over Wild West! My personal pizza was very good, but I had room for a bigger pizza after a long day of sightseeing and hiking.
Any burger lovers out there? The Buffalo Bar and TR’s Burgers are for you.
Last but not least, Running Bear Pancake House was in the running for breakfast or lunch! As the pancakes looked so good I really wanted to make it there. We had breakfast included at our hotel and ate a picnic lunch in the park every day so I will have to save it for another visit.
Island Park
Island Park is 30 minutes past West Yellowstone in Idaho. Accommodations are often a little cheaper here, but it is farther away from the park. There are plenty of places to eat in West Yellowstone that I wouldn’t make the drive here unless it’s on your way or you’re staying in Island Park.
If your travels do bring you to Island Park, dine at Connie’s Restaurant and Saloon.
Where to Stay
Canyon Village
Canyon Lodge and Cabins is a multi-property accommodation with over 500 rooms and cabins available. If you’re looking to stay in the park, but don’t want historic accommodations, Canyon Lodge is a good choice. In 2016 400 guest rooms were completed! Good luck reserving a room for under $300/night though!
You can also camp in Canyon Village at the Canyon Campground for a much smaller nightly fee. There are even flush toilets at this campsite! The campsite is within Canyon Village and close to civilization…..which may be a pro or a con!
Madison
The Madison Campground is located near the west entrance of the park. It’s handy coming from Canyon Village and to start out day 4.
West Yellowstone
West Yellowstone has the most accommodation options near, but not in the park. The west entrance is only a 10 minute drive from town. All of the following hotels are within walking distance to everything in West Yellowstone.
We stayed at the Best Western Weston Inn and would happily stay there again. Breakfast is included, but it is a pretty small breakfast area.
I considered booking at Al’s Westward Ho Motel as the two star hotel has some of the lowest rates in town. While it is a very basic motel, the reviews overall seemed good.
City Center Motel and Crosswinds Inn are other 2 star hotels, but with a little higher reviews. Also with higher price tags.
If money is no object you should bring me with you on your travels…..oh I mean you should book one of the highly rated Explorer Cabins.
Island Park
As mentioned above Island Park is 30 minutes farther than West Yellowstone, but accommodations are typically a little cheaper.
If you’re traveling solo or on a very tight budget, book at The Hideaway Hostel or the Hideaway Lodge. The hostel has female and mixed dormitory rooms. The Lodge has small rooms with and without private bathrooms. Breakfast is included at both.
If it wasn’t for the additional drive I would have booked the Springhill Suites. There wasn’t a good rate so it wasn’t worth it, but I was looking longingly at the outdoor hot tub.
Due to the great reviews, Pendleton Pointe Lodging was another property that was on my consideration list. It’s located north of Island Park so slightly closer to Yellowstone.
Day 4: The Geyser Basins of Yellowstone
To finish off your 4 day Yellowstone itinerary you will be treated with geysers galore! As you have noticed there are geysers all over Yellowstone, but today’s itinerary takes you to the geyser basins with the highest concentration of geysers in the park (Upper Geyser Basin, Midway Geyser Basin, Lower Geyser Basin, and Gibbon Geyser Basin).
Day 4’s route goes from West Yellowstone to Old Faithful and back to West Yellowstone. You will drive from West Yellowstone to Old Faithful without stopping and then make several stops on the way back to West Yellowstone.
If you are heading to Grand Teton or Jackson Hole next, follow this route one way in reverse to the south, instead of backtracking to West Yellowstone.
What To Do
Upper Geyser Basin
Old Faithful Visitor and Education Center
No Yellowstone road trip would dare to leave out Old Faithful. It’s the Rudolph of geysers. Just like Rudolph is the most famous reindeer of all, Old Faithful is the most famous geyser. Its name is due to the regularity in which it erupts. While the eruption times are very predictable, you don’t want to miss it! Check online for eruption times and verify at the visitor center when you arrive. There are also predictions for other geysers here.
Depending on timing, visit the center before or after watching the eruption. It’s another good visitor center for science lovers who want to understand how all the geothermal features of Yellowstone work.
As usual there is also information on the area, knowledgeable rangers, films, and a gift shop.
Yellowstone Tribal Heritage Center
Near the visitor center is the Yellowstone Tribal Heritage Center. From the end of May to the middle of October the center has presentations from the 27 associated tribes of Yellowstone NP. Some of the topics covered in presentations include beadwork, dancing, photography, storytelling, quillwork, and moccasin making. Check the upcoming schedule.
Old Faithful from the Boardwalk
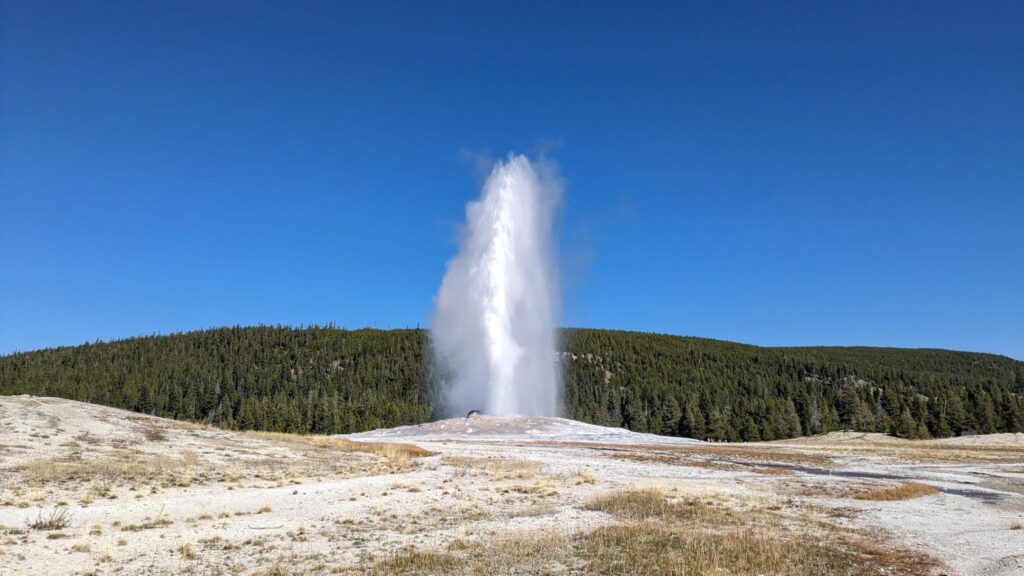
There are two ways to witness the most famous eruption of all. A few feet outside of the visitor center benches provide seating for hundreds of visitors around the world. Visitors truly do come from around the world! Grand Canyon NP and Yellowstone NP are the two parks where I noticed the biggest international crowds.
This is the closest view you can get to really take in the 106 – 184 foot eruption. Old Faithful erupts about every 60 – 90 minutes. During busy times of the year you’ll want to arrive early to snag a good seat. While you wait you can watch all the onlookers with their cameras at the ready for the moment she blows! The actual eruption lasts anywhere between 1.5 to 5 minutes.
Old Faithful from Observation Point
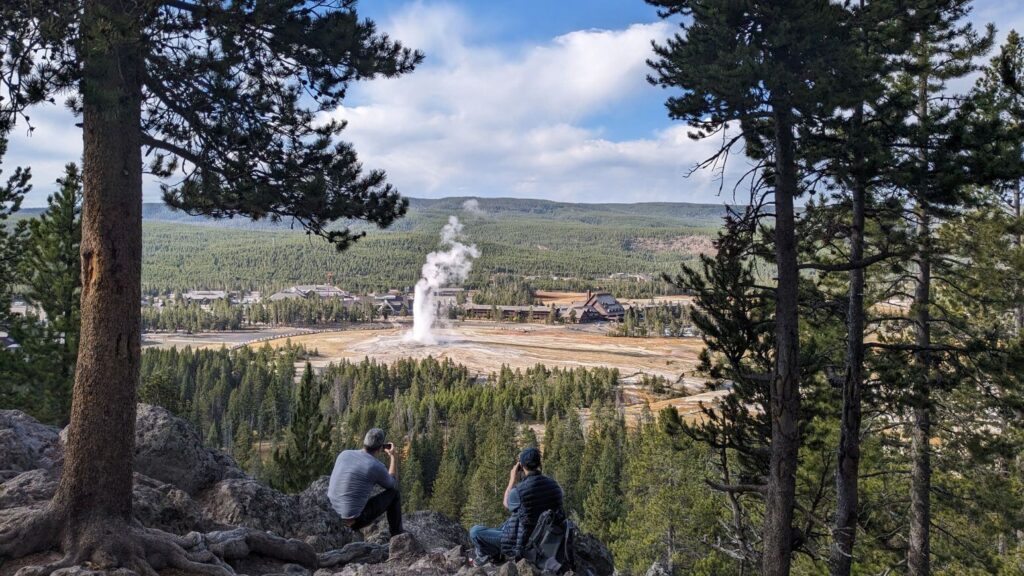
You can also have a bird’s eye view of the eruption by hiking to Observation Point. From the visitor center it is about 1.6 miles round-trip. It’s a short trail, but it is somewhat steep on switchbacks.
The observation area is significantly less crowded. There were less than 10 other people up there with us, versus at least 200 at the boardwalk. Due to the distance and the angle, the eruption isn’t quite as impressive, but it still was cool to see from a different vantage point.
If you only have time for one, view it from the boardwalk, but ideally witness it from both.
Observation Trail
Instead of returning to the visitor center and the main Old Faithful viewpoint, continue on the Observation Trail to Solitary Geyser and connect with the Upper Geyser Basin trail.
Hang out at the Observation Point a bit and let any other hikers take off before you. The trail through the forest and the geyser itself will then provide some solitude in an otherwise very busy part of the park. Eruptions at Solitary Geyser happen frequently so once at the geyser it is worth sticking around for a few minutes.
Hydrothermal Features Along Firehole River
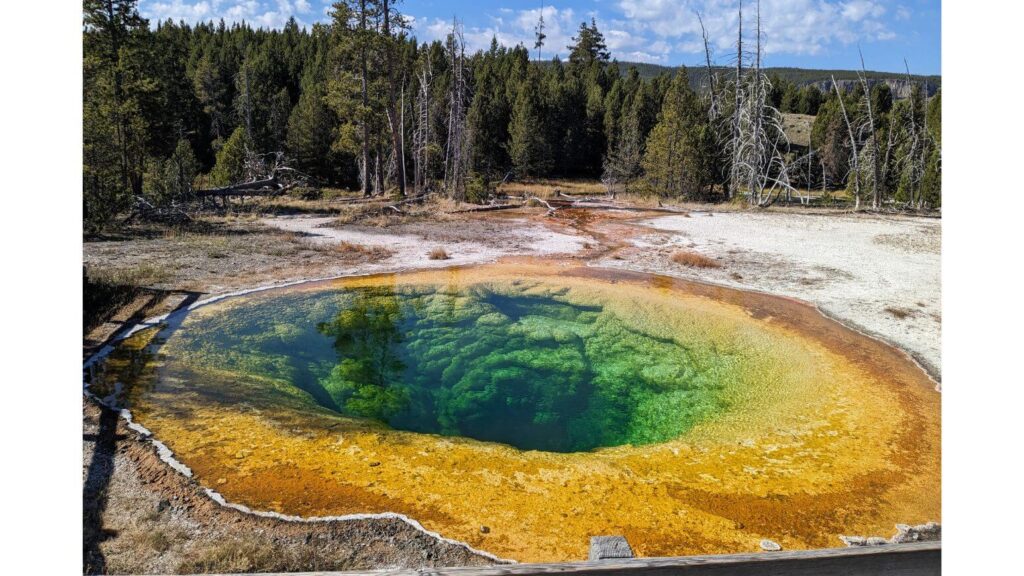
Did you know that about 60% of the world’s geysers are in Yellowstone? Old Faithful is the most well known, but it is one of 500 geysers at Yellowstone! The Upper Geyser Basin is overflowing (literally) with hydrothermal features. In just one square mile there are around 150 hydrothermal wonders!
Walk the boardwalk trails to see geysers, mud pots, fumaroles, and hot springs. Needless to say it’s a unique place with interesting colors and always something spraying, hissing, bubbling, or steaming. You don’t need to head to specific features at set times, but the following are a few to check out.
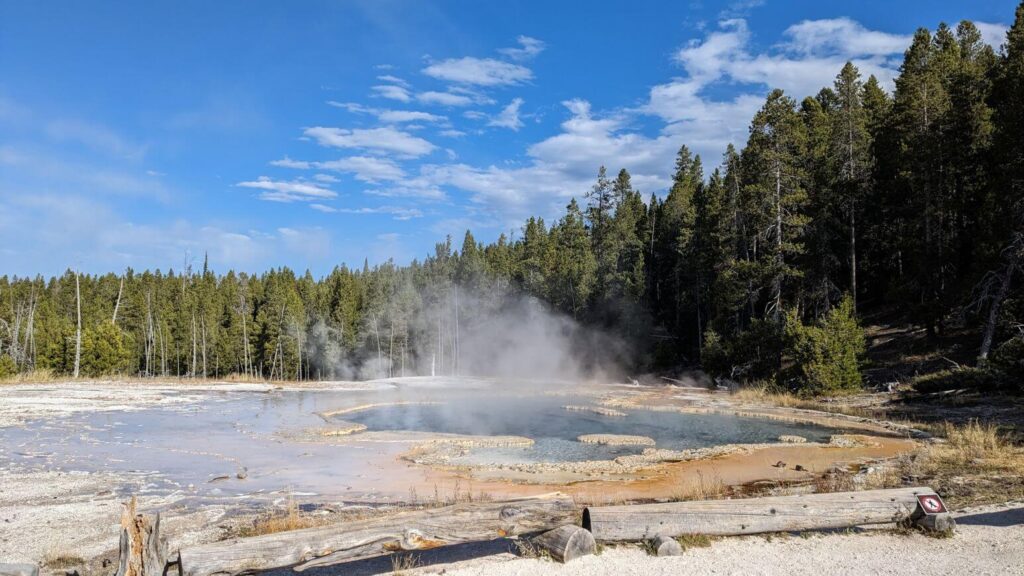
Considering it only erupts every 8 hours or so, we were lucky to witness Grotto Geyser exploding. Definitely check out the cool colors of Morning Glory (a hot spring pictured above). If you time it right, Grand Geyser is a spectacle to witness. It’s the tallest predictable geyser in the world. Its predictability is quite large at 75 mins +/- so we weren’t able to see it.
The Upper Geyser Basin is a 3.5 mile loop from the Old Faithful Visitor Center. With Observation Point it is about 4.9 miles total. We hiked up to Observation Point, saw the eruption from there, hiked to Solitary Geyser, did the Upper Geyser Basin Loop, and returned to the boardwalk in time for another water show!
Black Sand Basin
We turned around at Morning Glory, but you can also walk or drive to Black Sand Basin. As it adds 2.8 miles round-trip if you add on the hike, most people return to their car at Old Faithful and drive to Black Sand Basin.
Named for the black volcanic sand (obsidian), Black Sand Basin has several hydrothermal features. There are several colorful pools and Cliff Geyser which erupts every few minutes. The boardwalk trail is about .6 miles round trip.
Biscuit Basin
Biscuit Basin is also part of Upper Geyser Basin but it was closed during our 2024 visit and as of the published date it is still closed until further notice.
Midway Geyser Basin
Next is Midway Geyser Basin which is most known for Grand Prismatic Spring, Yellowstone’s largest hot spring. There are two ways to admire this beautiful, colorful hot spring. There is a closeup view from a boardwalk trail and a longer trail to an overlook. You’ll need to park in separate lots. Ideally make time to see it from both vantage points.
Grand Prismatic Spring Overlook
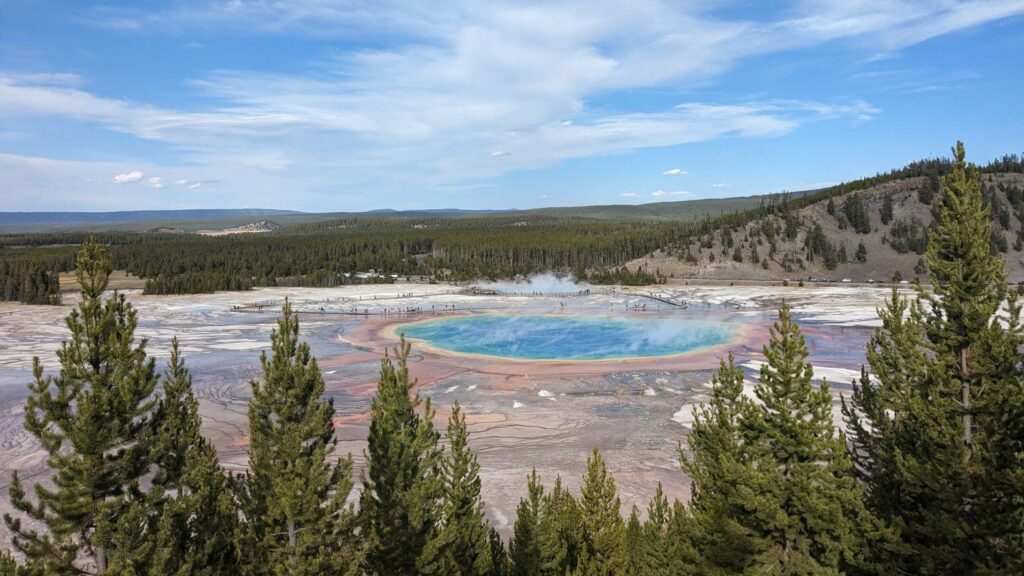
If you’re following the Yellowstone road trip and traveling south to north you’ll want to do the overlook first. The 1.6 mile hike begins from the overlook/Fairy Falls parking lot (marked on the map above). It was the busiest Yellowstone hike we did. While I found most of the Yellowstone hikes to be fairly deserted, this one was very popular. Although it’s not accessible, it is short and easy enough for most visitors. The entire trail is wide which is nice for all the visitors. Initially it is flat, but then it begins to climb to the overlook. We saw a bison along the trail in the initial flat section!
Midday is the best time to see the vibrant colors without mist. While the pool is farther away, the overlook offers an awesome bird’s eye view. You’ll be able to take in the colors much better from above. Be prepared for a lot of people and having to wait to get a view and photos in the prime spots.
Head back to the parking lot or continue in the opposite direction to the Fairy Falls trail which makes it a 5.4 mile round-trip hike. For an even longer hike continue to Imperial Geyser after the waterfall. We would have loved to see the tallest waterfall in Yellowstone, but this day was less about hiking for us and more about the iconic sights!
Grand Prismatic Spring Boardwalk
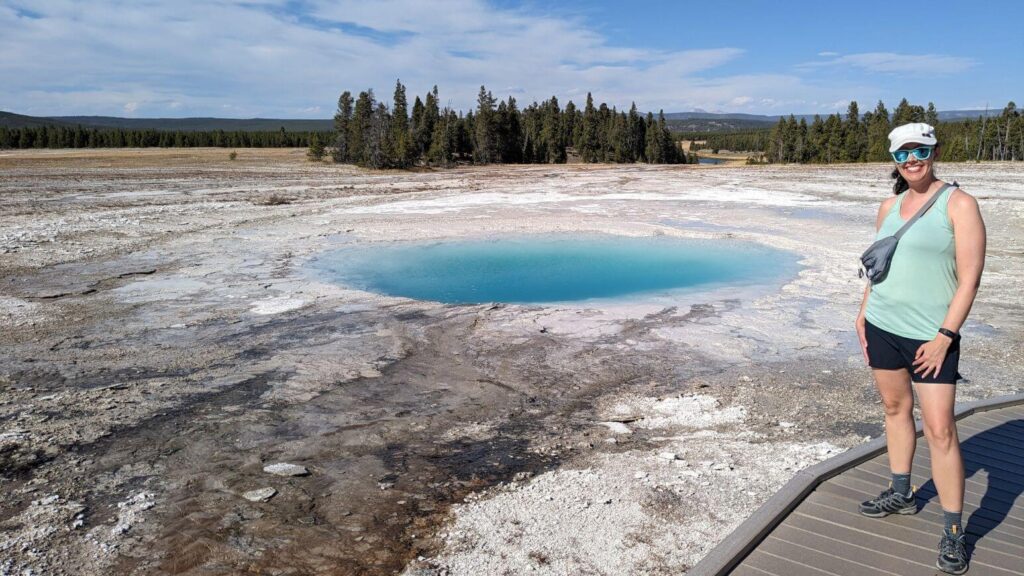
Next drive to the Grand Prismatic Spring parking lot. If you want to avoid hiking, skip the overlook and head here initially. This parking lot is very small and fills up quickly. Be prepared to wait in line for a parking spot (or park at one of the pull-outs before you get to the lot).
From the parking lot the Midway Geyser Basin trail is a .7 mile boardwalk loop. Don’t use up all your patience waiting for a parking spot, you’ll need it on this crowded one-way boardwalk as well. The close view of Grand Prismatic Spring is the draw, but with all the steam coming off it was actually really hard to see the colors. I enjoyed the other beautiful blue pools more, like Opal Pool above.
Lower Geyser Basin
This is the largest geyser basin in Yellowstone. The geysers are more spread out, but so are the humans!
Firehole Lake Drive

This is a great option if you want to see interesting sights without going far from your vehicle. Many geysers can be seen from the road, but there are also several pull-outs along the 3 mile one way paved road. Stop whenever something catches your fancy!
Fountain Paint Pot Trail

The Firehold Lake Drive conveniently comes out directly across from the Fountain Paint Pot parking lot. In only .6 miles you’ll walk past all four of the major hydrothermal features in Yellowstone. The boardwalk trail makes a loop.
Gibbon Geyser Basin
Artist Paintpots Trail

Still haven’t had your fix of hydrothermal activity? Artist Paintpots Trail is one more you can add. We made a quick stop here at the end of day 3 while driving from Grand Canyon of the Yellowstone to West Yellowstone, but it’s also an option at the end of day 4.
After a half mile hike through a forest it’s hard to say if you will see, smell, or hear the mud pots first! There’s a variety of hydrothermal features, but the mud pots take center stage. Who knew watching flying mud could be so much fun!? The total trail length is about one mile out and back, with the loop at the end.
Note that Norris Geyser Basin is another popular area just north of Gibbon Geyser Basin. We didn’t have time for that area and considering how long this 4 day Yellowstone itinerary ended up, I think you’ll have plenty to keep you busy too!
West Yellowstone
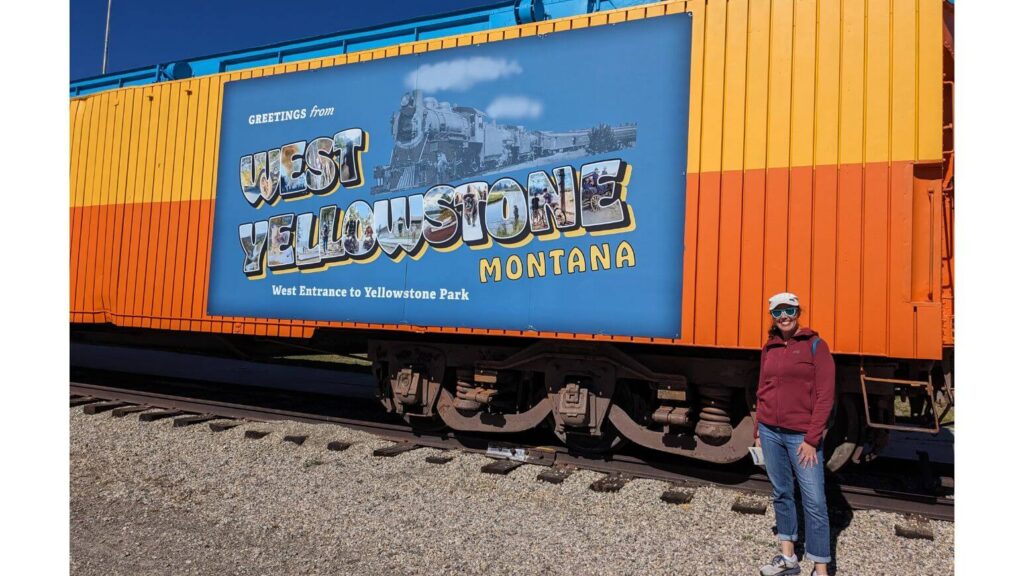
Before wrapping up the Yellowstone itinerary I wanted to mention a few things to do in West Yellowstone.
Museum of the Yellowstone
This is a really great small history museum. It was super interesting to learn about early transportation to Yellowstone, some of the first visitors, the Yellowstone Fire of 1988, and how bears became a roadside attraction.
West Yellowstone Visitor Information Center
There aren’t exhibits here, but pick up a self-guided walking tour. The informative brochure will lead you around the historic district and provide details of the different places. There are a few buildings you’re welcome to go inside and learn more about too. Plus you’ll find many of the cool painted buffalos around town.
Grizzly & Wolf Discovery Center
Didn’t see a bear or wolf in Yellowstone? Not to fear, it’s not too late! Go to the non-profit wildlife center with indoor and outdoor exhibits. It is a sanctuary for animals who are not able to be in the wild.
Where to Eat
Old Faithful
The Old Faithful area has the most dining available of anywhere in the park. There is everything from to-go items, to a bakeshop, to ice cream, to drinks, to sit down meals.
Each place is first come, first serve except dinner at the Old Faithful Inn Dining Room. Make reservations for dinner in advance if you are a park hotel or campground guest and same day reservations if not.
The food and drink options are all within Old Faithful Inn, Old Faithful Lodge, and Old Faithful Snow Lodge.
West Yellowstone & Island Park
See the recommendations under where to eat on day 3.
Where to Stay
Old Faithful Inn
Built in the early 1900s Old Faithful Inn is one of the only remaining log hotels in the US. I wish I would have taken a peek inside to see the rustic 65 foot ceiling in the lobby.
You can’t find a better location and you will be able to watch Old Faithful before and after the sightseers arrive/leave. You will be paying top dollar for that privilege though. A room in the old part of the hotel without a private bathroom will set you back anywhere from $200 – $300/night depending on the time of year. Add on at least another $100/night for a standard hotel room.
Old Faithful Lodge
Old Faithful Lodge is a historic cabin property. There are cabins with and without bathrooms. Views of Old Faithful from the lobby can’t be beat!
Old Faithful Snow Lodge
In the same area is a newer full service property with cabins and lodge rooms.
West Yellowstone & Island Park
Check the suggestions under where to stay on day 3.
Yellowstone Itinerary FAQs
How do I get to Yellowstone National Park?
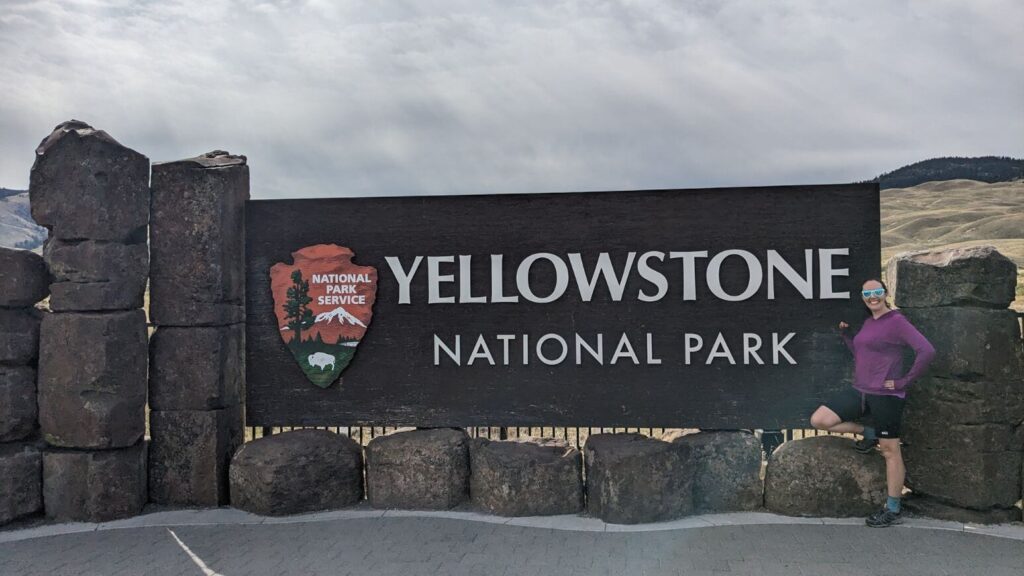
The majority of Yellowstone National Park is located in the northwest corner of Wyoming. Many of the gateway towns and cities surround the park in Idaho and Montana.
By Air
There are several airports that provide access to Yellowstone. If you follow this 4 day Yellowstone Itinerary, fly into Bozeman (BZN). Billings (BIL) is farther away, but also provides access to the north entrance of the park. The majority of US airlines fly to BZN and most fly to BIL.
Then fly out of Yellowstone Airport (WYS) in West Yellowstone near the west entrance to the park. It’s a seasonal airport with Delta flights to Salt Lake City and United flights to Denver. Idaho Falls (IDA) is about two hours away from the west entrance and serves additional airlines and cities.
United flights to Denver are also available at Yellowstone Regional Airport (COD) in Cody, near the park’s east entrance.
Jackson Hole Airport (JAC) is the closest to the south entrance. It’s convenient if you’re combining your visit with Grand Teton NP.
Salt Lake City is a Delta hub and the largest airport near Yellowstone. It’s about a 5 hour drive to the west entrance.
By Train
Oh how I wish it was like the early days of Yellowstone when trains came to Mammoth and West Yellowstone. There are no longer train stops close to the park.
By Bus
Buses aren’t much better. Cities closest to the park that Greyhound stops in include: Cody, WY, Jackson, WY, Bozeman, MT, and West Yellowstone, MT. You’ll need to rent a car or take guided tours once you arrive.
By Guided Tour
There is no public transit in Yellowstone. You’ll need to have your own vehicle or take guided tours from one of the cities you can reach by public transit or plane. Here are a few options:
- 1 Day Tour from West Yellowstone
- 1 Day Tour from Gardiner
- 1 Day Tour from Jackson
- 2 Day Tour from Jackson
- 1 Day Tour from Cody
- 1 Day Tour from Bozeman
- 2 Day Tour from Bozeman
- 3 Day Tour from Salt Lake City
- 6 Day Tour from Salt Lake City
When is the best time to visit Yellowstone National Park?
November – April
Most of the roads are closed to automobiles. The only road open year round is from the North Entrance to the Northeast Entrance. From mid-December to about mid-March many of the roads are open to snowmobiles.
Most of the hotels and restaurants in the park are closed. Old Faithful Snow Lodge and Mammoth Hot Springs Hotel are the exceptions. There are some warming huts that provide shelter, restrooms, and/or light refreshments. Many hotels and restaurants in the surrounding towns are also closed.
May – June
Roads begin opening up to vehicle traffic. There still can be plowing and snow on the trails depending on the year.
July – August
The busiest time of the year when everything is open and roads are clear.
September – October
They say September is the new July with increased visitor numbers, but it’s still the best month to visit. As students are back in school it cuts down on the crowds. Yet, everything is typically still open.
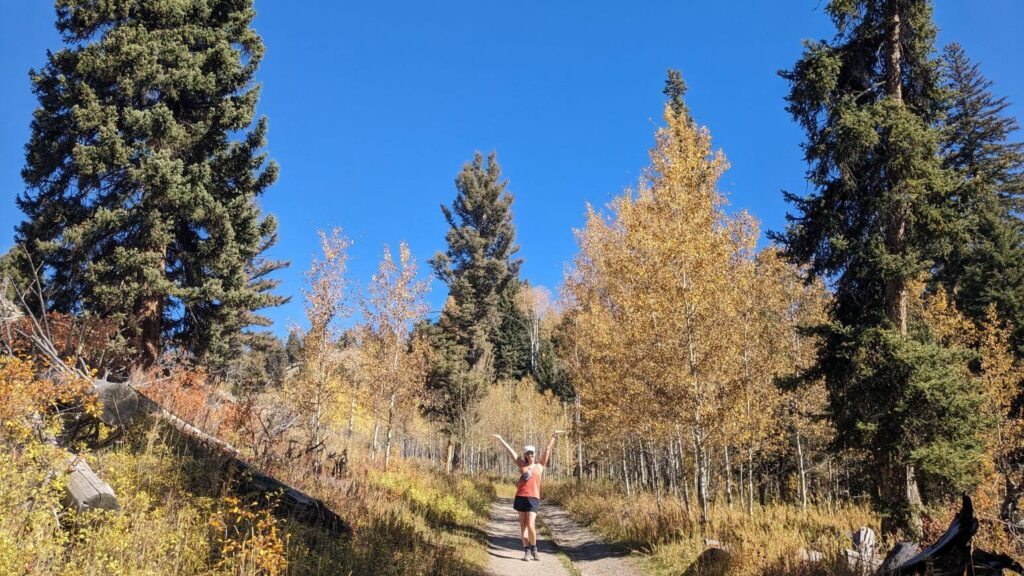
We may have just got lucky because our 4 days in Yellowstone may have been the best four days the entire month! The weather was incredible. It wasn’t too hot to make for unbearable hiking, but as you can see from my hiking attire it was still nice and warm. We had gorgeous blue skies every day!
Not to mention it’s the best time of year for fall color (typically the last two weeks of September and into early October).
Roads usually stay open through October, but there can be snow already.
How many days do I need in Yellowstone National Park?
When I was researching how many days to spend in Yellowstone I saw everything from a one day Yellowstone itinerary to people who have visited 50 times and still have not seen it all. You can easily spend multiple weeks in Yellowstone. If you have flexibility, aren’t hiking all day every day, and are camping to save on hotel costs you may want to extend this Yellowstone itinerary.
Otherwise four days in Yellowstone works well to spend in four of the best regions of the park. As much as I didn’t want to leave, I don’t think my legs could have handled another full hiking day!
Where Should I Go Before or After Yellowstone?
Many visitors combine a trip with Grand Teton National Park.
Another option is to also visit Glacier National Park before or after Yellowstone. Follow my 4 day Glacier National Park itinerary, make a stop in Great Falls and/or Helena before continuing with the Yellowstone itinerary above. The timing can be adjusted, but it will be about 10 days to follow that route.
If you’re flying into Salt Lake City there are a lot of amazing hikes in and around the city. There are also plenty of museums and attractions to explore. Check out my Salt Lake City itinerary for a full guide to where to go, eat, and stay.
How much is Yellowstone National Park?
Entry is valid for 7 days. For pedestrians and bicyclists it is $20 per person. Private vehicles are $35 and cover everyone in the vehicle.
If you’re planning to visit more national park sites buy an America the Beautiful pass. Depending on which NPS you visit it is worth it after only 2 or 3 admissions.
Do I need a vehicle reservation for Yellowstone National Park?
Nope!
How do I visit Yellowstone National Park safely and responsibly?
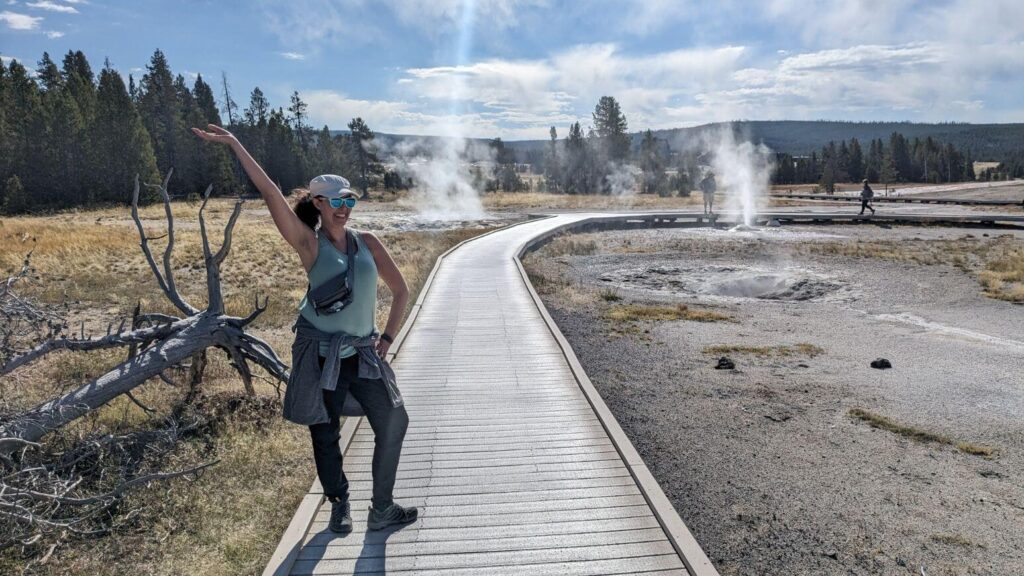
I’m so glad you asked! Out of the 15+ national parks I have been to, Yellowstone has more tourists than any other park. Don’t be a touron (a moron at Yellowstone). Unfortunately this is not just a social media term, but a very real occurrence at the park.
Photography
While everyone on the trails in Yellowstone was very respectful, unfortunately the tourists at the most famous spots can damper your experience. Don’t be the person that is doing a photoshoot in front of Grand Prismatic Spring and preventing anyone else from taking a picture. After taking your photos please step to the side to check them. Standing in front of a major site scrolling through your phone, not looking at the site, and not letting anyone else, is a major no-no!
As wonderful as modern day photography is, take some time to look with your eyes too! I’m always amazed by the number of people who walk up to a sight, take photos, and leave. Spend a moment actually taking in the wonders of Yellowstone in real time.
Safety
It’s hard not to love the magnificent national parks in this country. One of the random things I love about the national parks is that there isn’t the man made fencing and borders that are found at so many US attractions. You’re able to enjoy the beauty of the country without obstructions. This means you have to be careful! Stay on the boardwalks and marked trails for both your own safety and the preservation of the landscapes.
Leave No Trace
You don’t need to leave your mark on the terrain. You’ve already spent enough time taking photos, you’ll have your memories.
At Morning Glory there is a sign explaining how the colors are changing because of so much trash being thrown in the hole. It’s so sad! Be grateful for your time at the park and ensure others can visit in the years, decades, and centuries ahead.
Wildlife
I wrote about many of the wildlife experiences you can have in different parts of the park. Be prepared to see any animal in any part of the park at any time. As I wrote about, keep your distance from wildlife!
Stay 100 yards from bears and wolves. From bison and elk stay at least 25 yards away. Never feed any animals, even the small innocent looking ones as it makes animals dependent on humans (I’m including this tip for my squirrel loving mom).
Will I see wildlife in Yellowstone National Park?
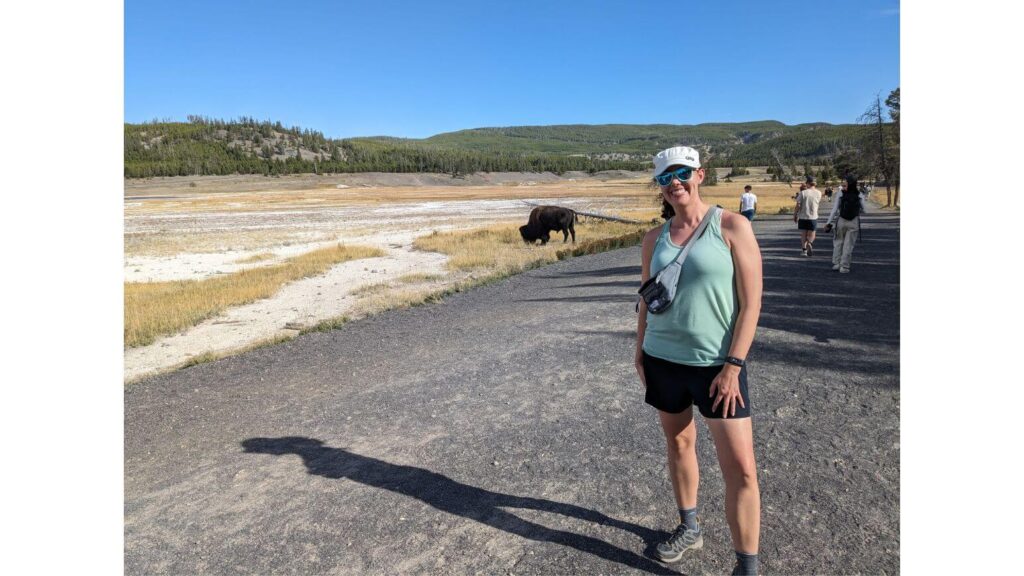
Yellowstone is teeming with wildlife. Whether you see it or not depends on being in the right place at the right time. Some people might say you are in the wrong place at the right time too if you are stuck in an animal traffic jam or find a bear on a trail! It’s all based on your perspective!
As I wrote above elk are very common in Mammoth and bison are found in Lamar Valley.
Taking a guided wildlife tour significantly increases your chances.
Where Should I Eat in Yellowstone National Park?
We brought a picnic lunch every day to eat on the trails or at the sights. It saves money of course, but also saves time to allow us to make the most of the daylight hours.
For dinner we dined in the towns we stayed in to avoid long, nighttime drives. Also the food options are much better. Xanterra is a travel operator that runs the restaurants and lodgings in many national parks including Yellowstone. I can’t speak for their tours, but I do try to avoid their restaurants. It’s typically basic, low rated American food, but at a high price tag.
There are recommendations for restaurants in the park and around the park in each section so you can choose what works for you. Wherever you choose to eat make sure it is open. Many restaurants in the surrounding communities are only open during the park’s peak season. Check closely for the opening and closing dates.
Where Should I Stay in Yellowstone National Park?
Similar to the food in Yellowstone, accommodations within the park are handy, but typically come with limited amenities and/or a hefty price tag. If you follow this 4 day Yellowstone itinerary and stay in the gateway towns around the park, it won’t add on too much extra driving.
Remember there are over 4 million visitors a year and most visit from June – September. Needless to say, make your reservations early! Especially if you want to stay in the park in a hotel. Park reservations open one year in advance. If your accommodation is sold out it doesn’t hurt to check back periodically as there can be cancellations. Hotel recommendations for in and around the park are included above. Links for those outside of the park are also included above.
Campsites also require reservations booked far in advance. Seven of the eleven park campgrounds (the ones on the daily routes) are included above and marked on the map. There are almost 300 additional backcountry campsites which I did not include. Read more about locations and permits for backcountry camping.
What should I bring to Yellowstone National Park?
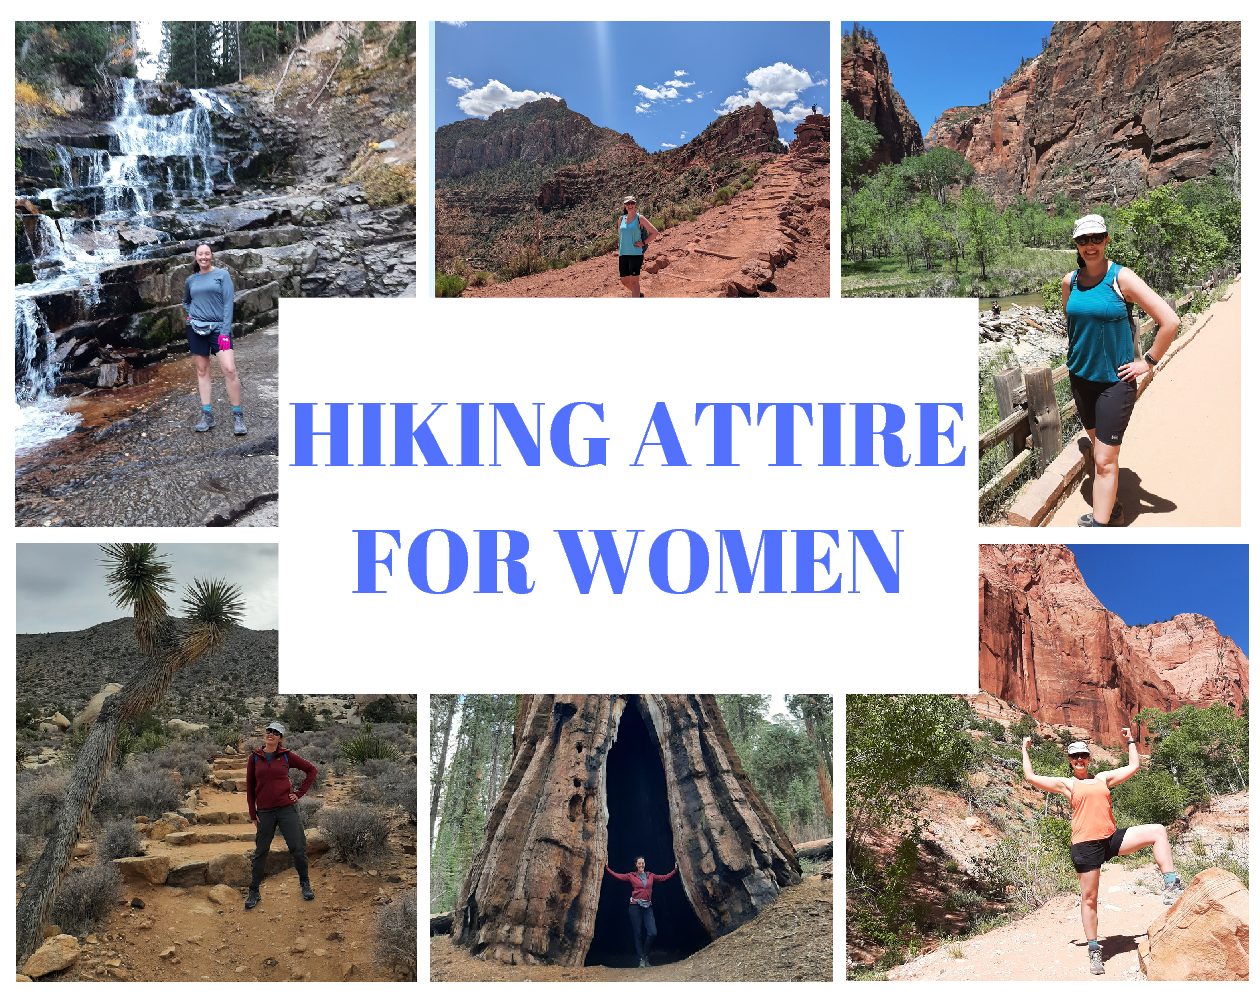
Prepare for what to wear with my hiking attire guide. See what to bring in your day pack. In addition to everything I listed in that post, make sure to have bear spray (don’t take it on the airplane).
I hope this 4 day Yellowstone National Park itinerary inspires you to book a trip to the oldest US national park! If I helped you plan your Yellowstone road trip please consider supporting me by Buying Me a Coffee so I can continue writing these super long, detailed guides for free!
More About Montana & Wyoming
- A 4 Day Glacier National Park Itinerary for Adventurers
- The Best Hikes at Glacier National Park
- The Best Places to Eat in Helena
- Fun Things to Do in Helena
- Indoor Things to Do in Great Falls
Pin It!!

You May Also Like
The Best Hiking Attire for Women
Southwestern Michigan Explorations: Saugatuck

