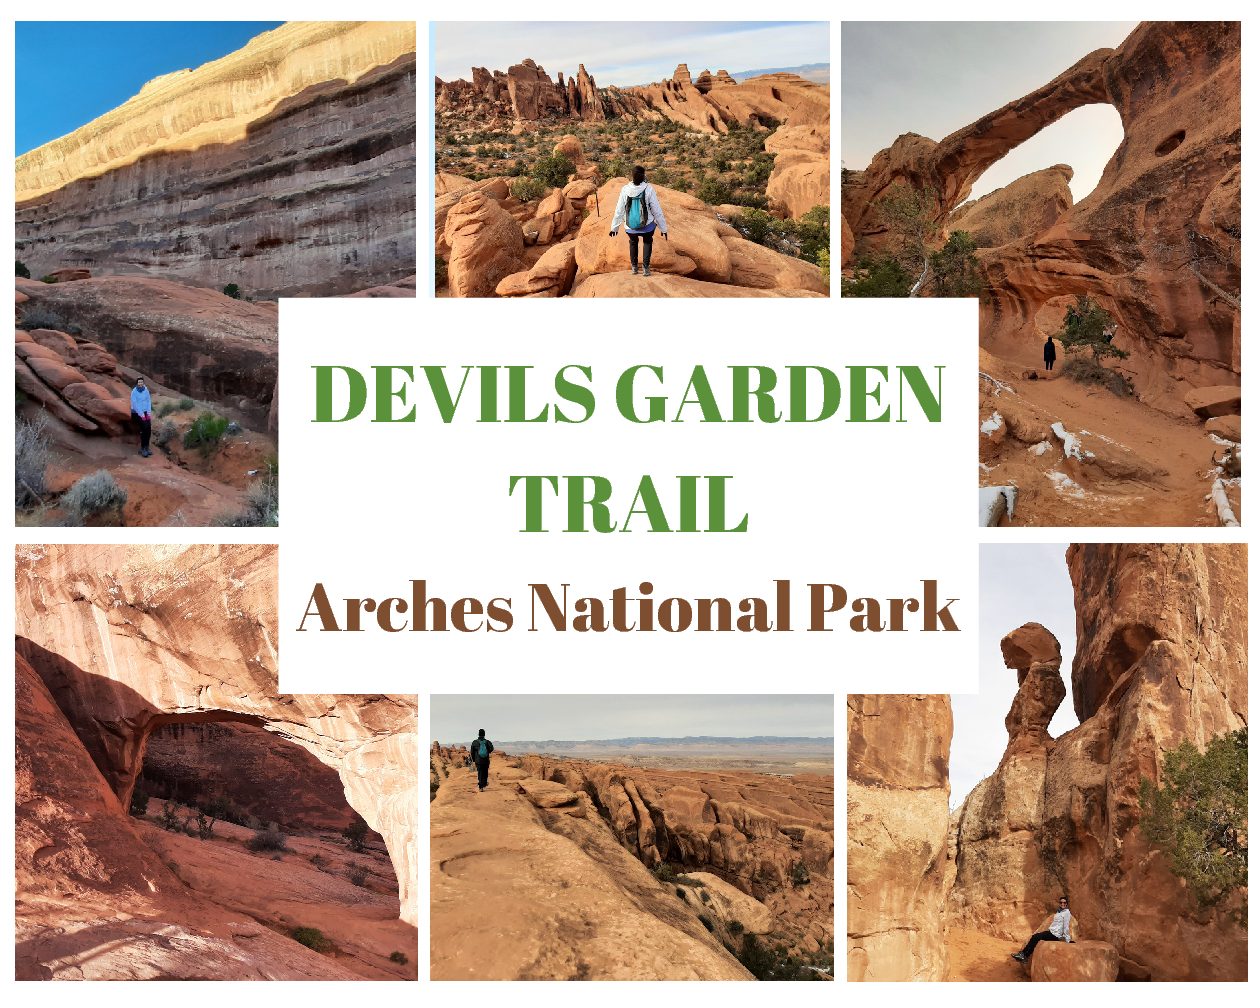
What is Devils Garden Trail at Arches National Park Really Like?
This post might contain affiliate links. That means I may earn a small commission at no extra cost to you, if you buy through my site. I appreciate your support of my site.
Arches National Park in Utah is full of amazing hikes. You really can’t go wrong with choosing a hike at Arches. You’ll be treated with natural stone arches and other red rock wonders on every trail. If you are short on time or hesitant about the difficulty of a trail it can be hard to decide though.
Before visiting Arches National Park I spent the most time researching the Devils Garden Trail. It is rated strenuous by the National Park Services. Not all strenuous trails are created the same. Some are strenuous mainly for the length, others for the elevation, some for the terrain, and others a combination of several factors.
I am becoming more confident in my hiking abilities, but on more challenging trails I still like to know what I am getting myself into. The Devils Garden Trail is one of the best hikes at Arches National Park to see several arches on one trail. There are a few different ways to hike the trail. This post will tell you everything you need to know about hiking Devils Garden Trail.
Prepare for the Devils Garden Trail by wearing the best hiking attire and bringing the essential day hiking gear! Read more about Arches as well as Canyonlands National Park in my full guide to Moab.
Hiking Devils Garden Trail at Arches National Park
Devils Garden Trail Stats According to the NPS
The following trail stats are for all sections of the trail round-trip. You do not need to hike the entire trail.
Difficulty: Strenuous
Elevation: 286ft
Distance: 7.9miles round-trip
Time Needed: 3 – 5 hours
Devils Garden Trailhead Parking
The Devils Garden Trailhead is the last trailhead in the park. It is 18 miles and about a 33 minute drive to the trailhead from the visitor center.
The parking lot has 160 parking spots including 10 oversized spaces. In the off-peak season in November during mid-day the parking lot was quite full. At peak times it is hard to find a place to park.
Devils Garden Trailhead Restrooms & Water
There are four single person restrooms with vault toilets at the trailhead. There is hand sanitizer in each one, but no sinks. No restrooms are located along the trail.
Never go off the marked trail unless necessary, but if nature calls when on the trail the primitive section of the trail will be easier to find a spot. Around the Private Arch might be your best bet for finding a private spot behind a tree.
Water fountains at the trailhead only run from spring to fall. Bring plenty of water with you.
Devils Garden Trailhead

Regardless of which arches you hike to and which direction you choose, everyone begins the trail at the same spot. The first .3 miles is an out and back trail with no other trails branching off. The trail is fairly flat and easy with views of all the rock formations nearby. After a short section between horizontal fins, the trail widens.
Devils Garden Arch #1: Tunnel Arch & Arch #2: Pine Tree Arch
At the trail junction you will have your first decision to make. To the right is Tunnel Arch and Pine Tree Arch. Visiting both the arches will add about .5 miles roundtrip to your hike. The arches are aptly named with Tunnel Arch looking like a tunnel and Pine Arch featuring a pine tree underneath.
When we hiked the Devils Garden trail we skipped the short detour to ensure we had enough time for the full loop. It really doesn’t add much time and you do get to see two additional arches. You can always save these arches for the end of the hike as well.
Should I Hike Devils Garden Trail Clockwise or CounterClockwise?
Back on the main trail from the junction that veers off to Tunnel Arch and Pine Tree Arch you will continue for about .5 miles farther. Before hiking much farther on the Devils Garden trail you will need to decide if you want to hike the entire loop.
The left side (west) of the loop is the main trail. Many hikers go to Double O Arch and then turn around and go back the same way. Others stop even sooner at Landscape Arch and turn around. The Primitive Trail makes up the right side (east) of the loop. As the name implies it is much more primitive and harder to follow.
If you are thinking about hiking the full loop you might be wondering if you should hike clockwise or counter clockwise. It seems every other person’s opinion is the opposite. We asked at the ranger station and the ranger recommended clockwise as you are going downhill for the majority of the primitive loop.
The following Devils Garden trail route is hiking clockwise. Keep reading to find out what the loop was like going clockwise.
Devils Garden Arch #3: Landscape Arch

Just past the loop junction for the main trail to the left and the primitive trail to the right is the Landscape Arch on the main trail. It is the longest arch in North America.
Up until this point, the trail is fairly flat and smooth. You’ll have no problems following the trail.
Devils Garden Arch #4: Partition Arch & Arch #5: Navajo Arch
Shortly after Landscape Arch you once again have an option for a short detour to two more arches, Partition Arch & Navajo Arch. It will add about 1 mile round-trip to your hike, but you will see two more arches.
Again we skipped these two as we were considering hiking the full Devils Garden trail loop and wanted to make sure we had enough time.
Towards Double O Arch

After Landscape Arch the trail becomes more challenging and more fun! During the .8 mile trail to Double O Arch (not including the two additional arches above) you’ll have to pay more attention to where the trail goes.
You can tell from the picture above with hikers in the middle and to the right that there is confusion about where to hike. In this spot you’ll want to stay in the middle and hike over the fin. Throughout the trail keep your eye out for cairns (rock piles) and head in that direction.

Several spots will have you doing a bit of rock scrambling and taking you over fins (narrow rock walls). If you are afraid of heights this will give you pause. In this section the rocks are pretty flat and wide enough that I had no second thoughts. It was the perfect mix of cool adventure with great views, without feeling too scary.
Devils Garden Arch #5: Double O Arch

From on top of a fin you’ll get your first glance of Double O Arch. Then you’ll venture down the rocks and head towards the double arches.
You can climb up to the top of the lower arch for a picture and view of the other side. My friend gave me a boost from the bottom as someone already up on the arch gave me a pull up. I don’t think I would have made it up on my own!
Dark Angel
Dark Angel is about .8 miles round-trip past Double O Arch. We didn’t make it there, but viewing the sandstone tower is a nice addition to add to your hike if you are planning to turn around and not continue on the Primitive Trail.
Devils Garden Primitive Trail

Now it is the moment of truth! Will you continue around on the Primitive Loop or head back the way you came? You can turn around on the Primitive Trail at any point, but the farther you get…..the farther you will have to go if you decide to return the way you came. The first half mile or so is fairly easy hiking on a sandy trail.
Devils Garden Arch #6: Private Arch

A short detour (.6 miles round-trip) leads to Private Arch. Just past the arch is an overlook to climb with spectacular views of the canyon.
We weren’t intending to take this detour, but we did accidentally. I will toot my own horn and say that I thought we were heading to this arch as it seemed like we were heading to the right (towards the arch) instead of forward (continuing on the loop trail).
Continuing on the Primitive Loop

From the Private Arch junction and for the following .4 miles, the trail has significantly less people and a lot of interesting rock formations. The biggest challenge is following the trail.
It’s easy to wander off the trail. Many times we stopped and asked each other “are we really supposed to go over that?”, “is there another way?”, or “this can’t be right”. On a lot of trails when we’re having those thoughts it can mean that we are indeed off the trail. With the Devils Garden trail, on the primitive section, you just don’t really know! Remember there are a lot of cairns so if you haven’t seen one in a while you are probably going the wrong way. Also don’t step over logs. Logs are typically guiding you as a border of the trail.
There is a spot that fills up with water. You’ll either need to scale the walls on the side or walk through water that can get fairly deep after rain/snow. Despite a ranger telling us there was water, we checked at the start of the primitive trail with a fellow hiker that had come that way. He said there was no water. There definitely was water, but it was easy enough to get around.
The Most Challenging Part of the Devils Garden Trail

If I would have known how scary this part was, I probably wouldn’t have wanted to do the full loop. It was almost better not knowing this part was coming. It started with a short, but very steep incline down. We couldn’t see or figure out any other way to go down. It was maybe 10ft or so. You really can’t walk down it as it is smooth rock.
We were pondering what to do when a couple with walking poles arrived. They kindly helped us down. The man braced himself at the top and I could hang onto his pole as I scooted farther down. I only had to free slide on my bottom a couple of feet (pictured above). It was plenty to get my adrenaline rushing!

Only a few feet farther we encountered a couple just standing around. You could tell they were debating what to do. It wasn’t until I turned the corner and realized that it was a very narrow slanted ledge to walk across. This time the drop off was much farther.
This part of the trail is pictured above. It isn’t anything death defying like a 500ft drop off, but it is scarier than it looks in the photo! We were debating with the other couple if we needed to turn around or if we could get across. Luckily my “hiking angels”, as I called the couple with the walking sticks, caught up to us.
The man secured himself and held his hiking pole so we could slowly start to inch across. The phrase “I held on for dear life” would be appropriate to this situation! He could only go out so far without slipping so the last few feet I had to do on my own.
Frozen in place with at least five pairs of eyes on me, I had never felt such terror! I begged my friend, who was already across, to come help me. You can barely stabilize yourself, much less help someone else. I was near tears, terrified to let go of the hiking pole and take a step. Usually in moments like this I would be embarrassed holding so many people up, but my ‘fear’ emotions definitely outweighed any other thoughts.
With A LOT of encouragement I hesitantly and safely made my way to safety! It was such a relief.
The Rest of the Primitive Trail

It was definitely one of my scariest moments hiking! Shaky, but relieved to have made it through, we continued on the trail. We had over a mile left before we got back to the junction where the main trail and primitive trails split.
That “scary” section took quite awhile and we had no idea what else was in store for us! At that point we wouldn’t have enough time to turn back and do that all again, but sunset would be coming quickly so we didn’t have a lot of time to spare.
Luckily the rest of the trail was fairly easy. The sandy terrain can make hiking a little more challenging, but the trail is mostly wide and level. We didn’t pass anyone else on the entire way back. Stopping to enjoy the absolute silence was amazing!
We celebrated “scrambling and climbing on uneven surfaces and near cliff edges”! From there it was the same .8 mile trail back to the trailhead.
Should I Hike Devils Garden Trail Clockwise or CounterClockwise?
Back to this earlier question. I think I would have found the hike less nerve-wrecking going counterclockwise (the opposite direction we went). While hiking uphill is often more physically challenging, in general hiking downhill is always harder for me as I am scared of falling. It’s hard to say though, as we may not have even made it up that one section we had to slide down on our bottoms.
It seemed like most people were hiking counterclockwise, but that may have been because we hiked later in the afternoon.
Final Thoughts on Devils Garden Trail
The Devils Garden Trail is definitely worth visiting. It was my favorite part of Arches National Park. If you have more time, the interest, and the ability I would recommend doing the entire loop with all the arches.
The downside of doing the primitive trail without more time is we missed out on several arches. Despite how scared I was, I am very glad we did the primitive trail. We still saw several arches, but also had the fun and challenge of staying on the trail. Plus there is nothing more exhilarating than succeeding at a challenge!
If you want to stay safe you can stay at home and watch TV every day, but what kind of life is that? What is life without a little heart-pounding adventure!
What else do you want to know about the Devils Garden Trail at Arches National Park? Leave your questions in the comments below. If I helped you prepare for your hike, please consider supporting me by Buying Me a Coffee!
More Utah Posts
NATIONAL PARKS
- Bryce Canyon Hikes
- Zion Hikes
- Zion to Bryce Canyon Guide
- Arches Hikes
- Canyonlands Hikes
- Weekend in Moab at Canyonlands and Arches
SALT LAKE CITY
Pin IT!!


You May Also Like

The Best Hikes in Olympic National Park by Region

Leutaschklamm Gorge Hike & Mittenwald, Germany